
Hiking the Inca Trail to Machu Picchu in Peru is on many travelers’ bucket lists and is one of the most popular hiking locations in the world and in South America.
Located in the Cordillera de Vilcabamba of the Andes Mountains, this trek has steep ascents, beautiful archeological sites, and gorgeous mountain peaks.
When I signed up for the 4 day Inca Trail hike, I didn’t realize how life-changing it would be and what a challenging hike it is. However, I’m happy to say that I completed the trek (all in one piece) and am living to tell the tale!
The trek was one of the most challenging things I’ve ever done but one of the most magical!
Below, I’m going to share what each day of the hike was like. If you’re looking for packing details and more essential information about the hike, please check out my Inca Trail Guide and packing list here.
While we’re at it, let’s be friends on Instagram and Tiktok!


A Guide to Hiking The Inca Trail To Machu Picchu in 4 Days
The Inca Trail to Machu Picchu is a total of 26 miles, and each day proposes its own challenges. Below, I’ll go into what to expect each day on the trek, along with what to pack and tips I learned along the way.
Do you need a guide to hike the Inca Trail?
Yes! Ever since 2002, the Peruvian government has required all hikers to have a permit and guide for hiking the Inca Trail. You are only allowed to go with licensed companies, and they are the only ones who are able to get permits. These permit fees are included with the cost of booking with a trekking company.
I hiked the trail with my friend, dad, and brother. We signed up through the trekking company PERU TREKS on the Classic 4-day Inca Trail Trek and 3 nights, which I HIGHLY recommend.
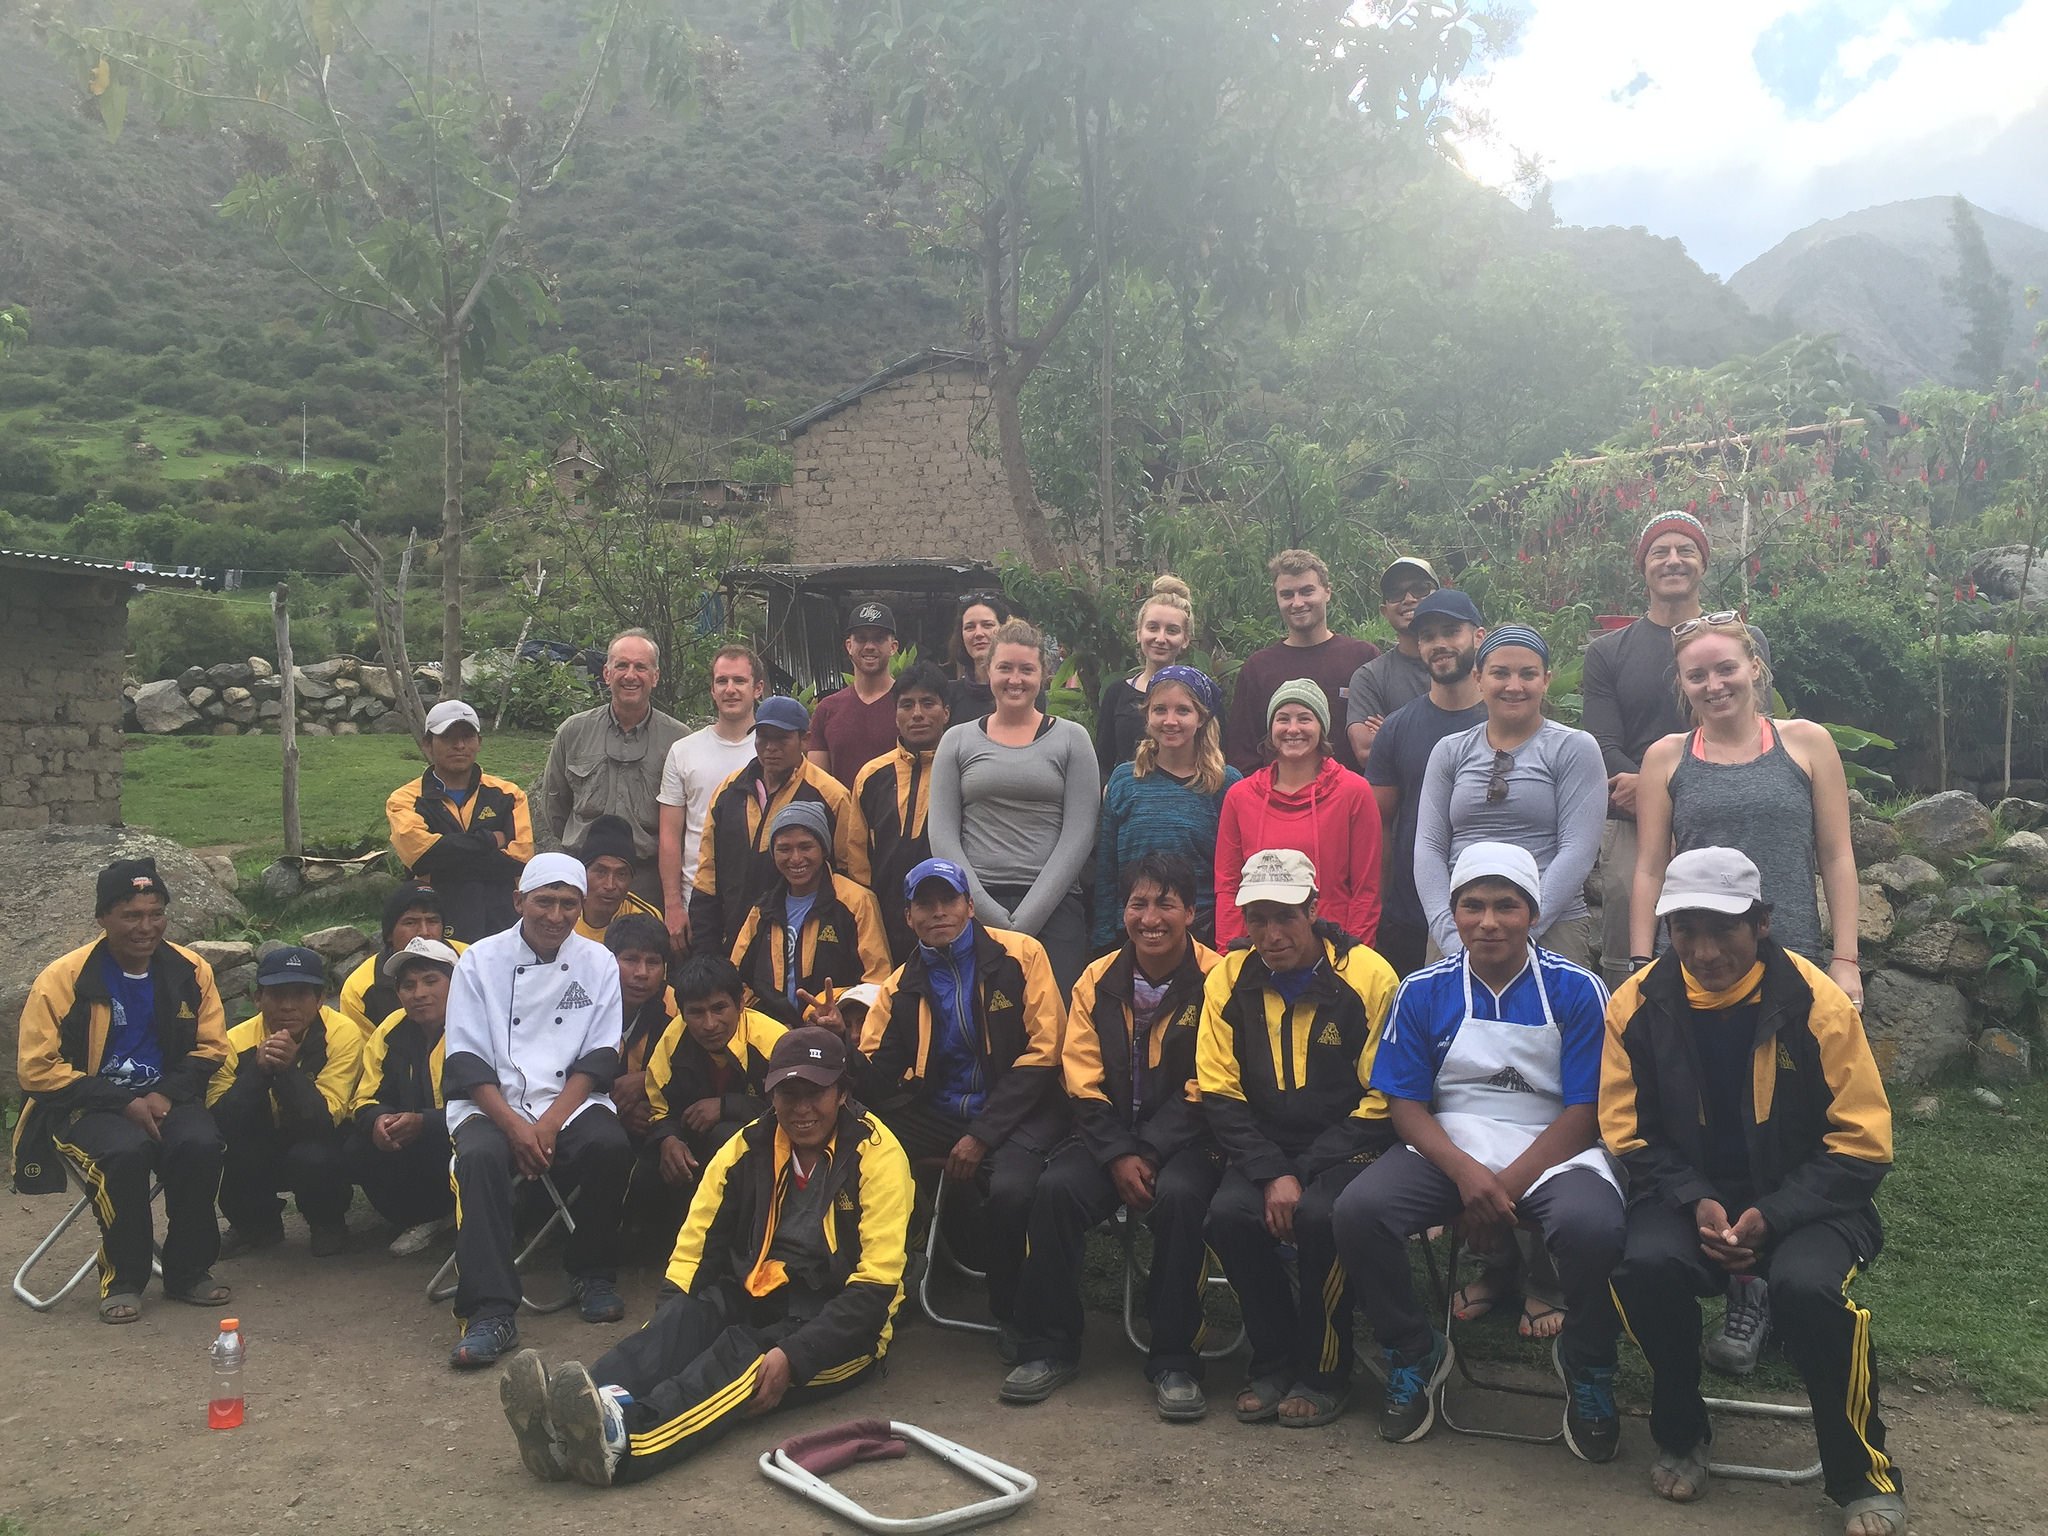
Our trek ended up with 14 people (ages 20-60 from all over the world), 2 guides, and 22 porters. There are plenty of Inca trail tours, guided tours, and tour operators, but we loved who went with so much.
When is the best time to visit Machu Picchu, Peru?
According to many people, the best time to visit Machu Picchu and hike the Inca Trail is from the end of March to May and from September to mid-December. This is because they fall before the rainy season, and you’ll get much better weather! June to August is also a great time to go but is much more crowded as it is high season.
We hiked the Inca Trail in November, which is the tail end of the dry season and the beginning of the wet season, but booked our trek online in May. Some people on our trek didn’t book until July, but treks do sell out, and there are only a few Inca trail permits per year, so it’s essential to book early!
How many days to spend in Cusco before the Inca Trail?
It is recommended by most companies that because the Inca trail is at such a high altitude, to stay in Cusco for a few days (2-3 days) to acclimatize. Cusco is 11,152′ above sea level, and just staying here causes some people to get altitude sickness. The good news is that Cusco is a really cool mountain town and there is plenty to do! You can also take a tour of the Sacred Valley of the Incas like we did!
Read Next:


Day 1 on the Inca Trail
Trek from Kilometer 82 (km 82) to Wayllabamba (6.8 miles 11km)
The bus ride and trailhead
We had a super early start to the trek on the first day. The bus with the rest of our trekkers and our fantastic tour guide Ernesto picked us up from our Cusco hostel (Pariwana Hostel) at 4 am, and we began our hour-and-a-half bus ride through local communities to Ollantaytambo to eat breakfast before the trek.
This is the town where all of the porters gather to hop on with their trekking company. After breakfast, we drove a little further to kilometer 82, where the trailhead is located and where we got our passports stamped with the trail stamp.
Day 1 trekking
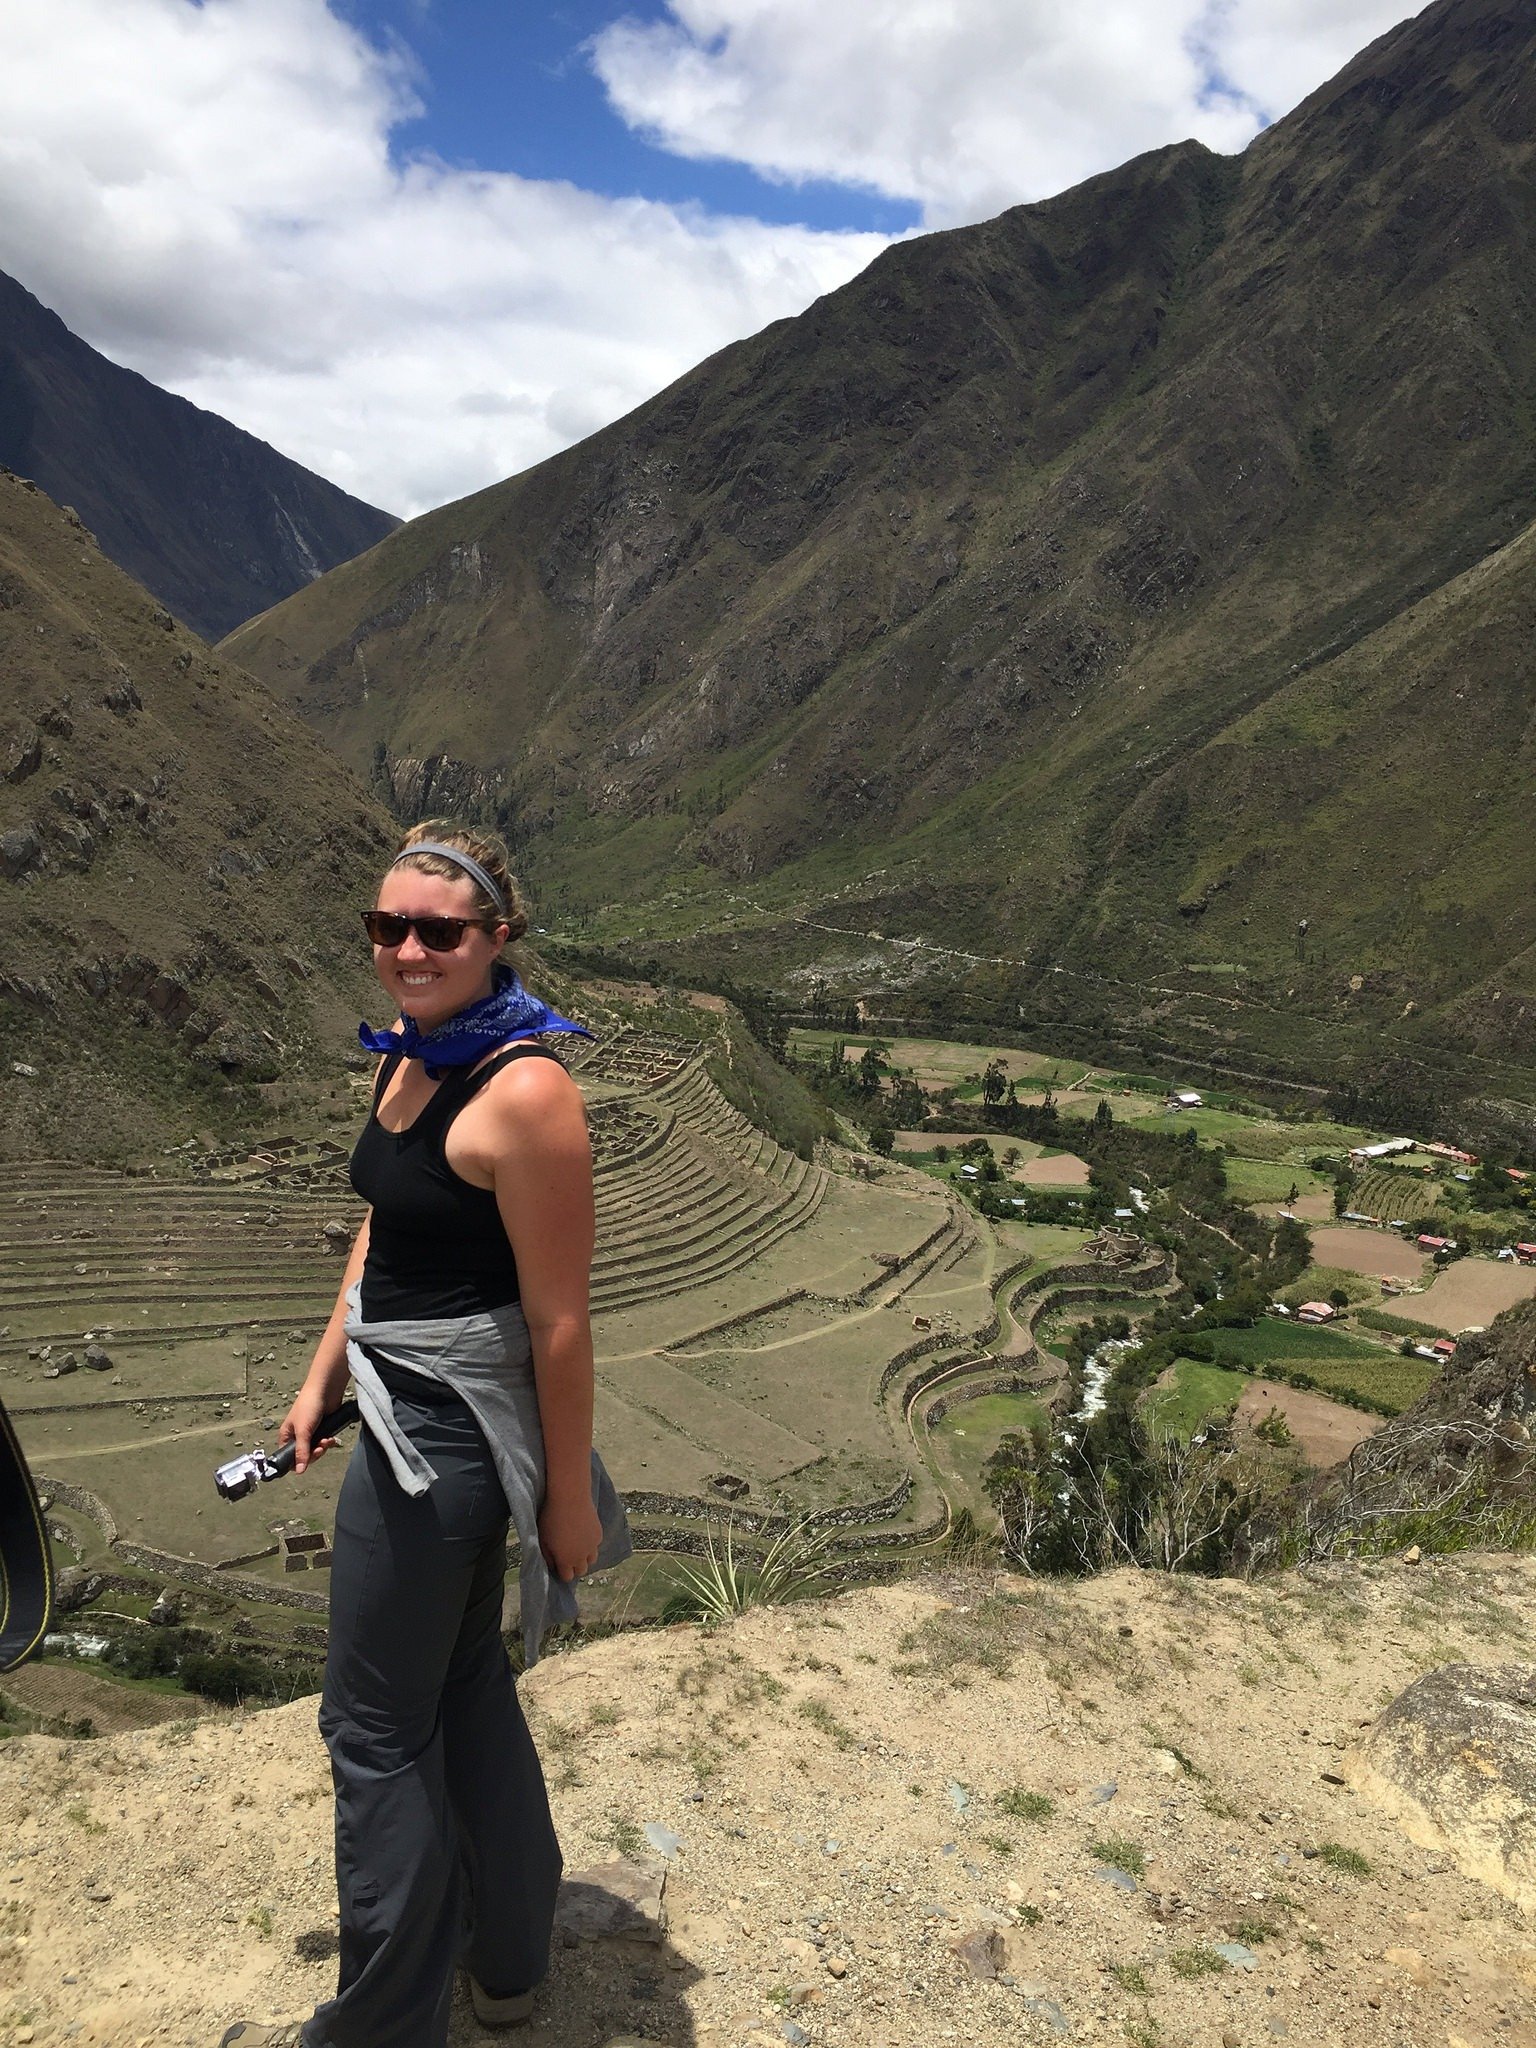
The start of the trail was pretty easy in the morning. We trekked through some old towns and a few Inca ruins like the one in the photo above, Llactapata. This ruin is built right into the side of the mountain with a great water source surrounding it. At one point, this ruin had about 100-200 inhabitants!
The majority of day 1 was what they call “Inca Flat,” where you go up, down, and flat most of the way.
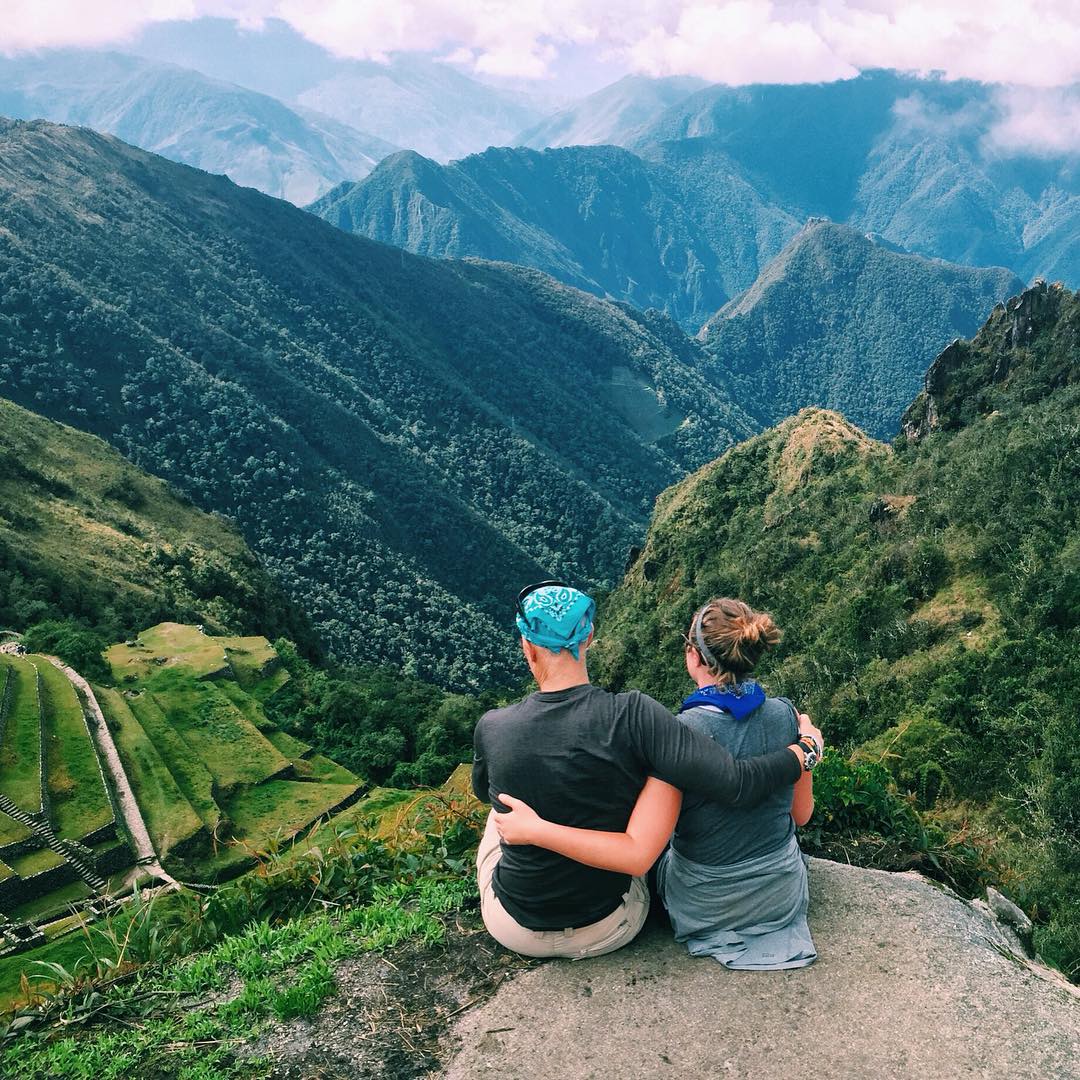
The views were INCREDIBLE, and it was only the beginning. Ernesto, our guide, taught us how to chew on coca leaves and natural stevia to ward away the altitude sickness, and he also showed us how to perform a little Inca ceremony with the coca leaves for Pachamama (Mother Earth).
This was a great way to be introduced to the Incan and Peruvian highland cultures.
All day long, the weather was HOT, and I got super sunburned! I was really happy that I had bought a bandana at the trailhead to cover up my neck and shoulders from the direct sun.
Day 1 lunch
Before lunch, we hiked up a pretty steep hill, and at the top, we arrived at a lunch that the team of porters had already cooked and prepared for us.
We had a 4-course meal, drank coca tea for the altitude, and had free time to take a siesta.
At this point, I still had high energy and thought, “If this is what we’re doing the whole time, it’s a piece of cake!” No problemo!
Hike to our campsite
We then started back up again for about 2 more hours to our campsite at Wayllabamba.
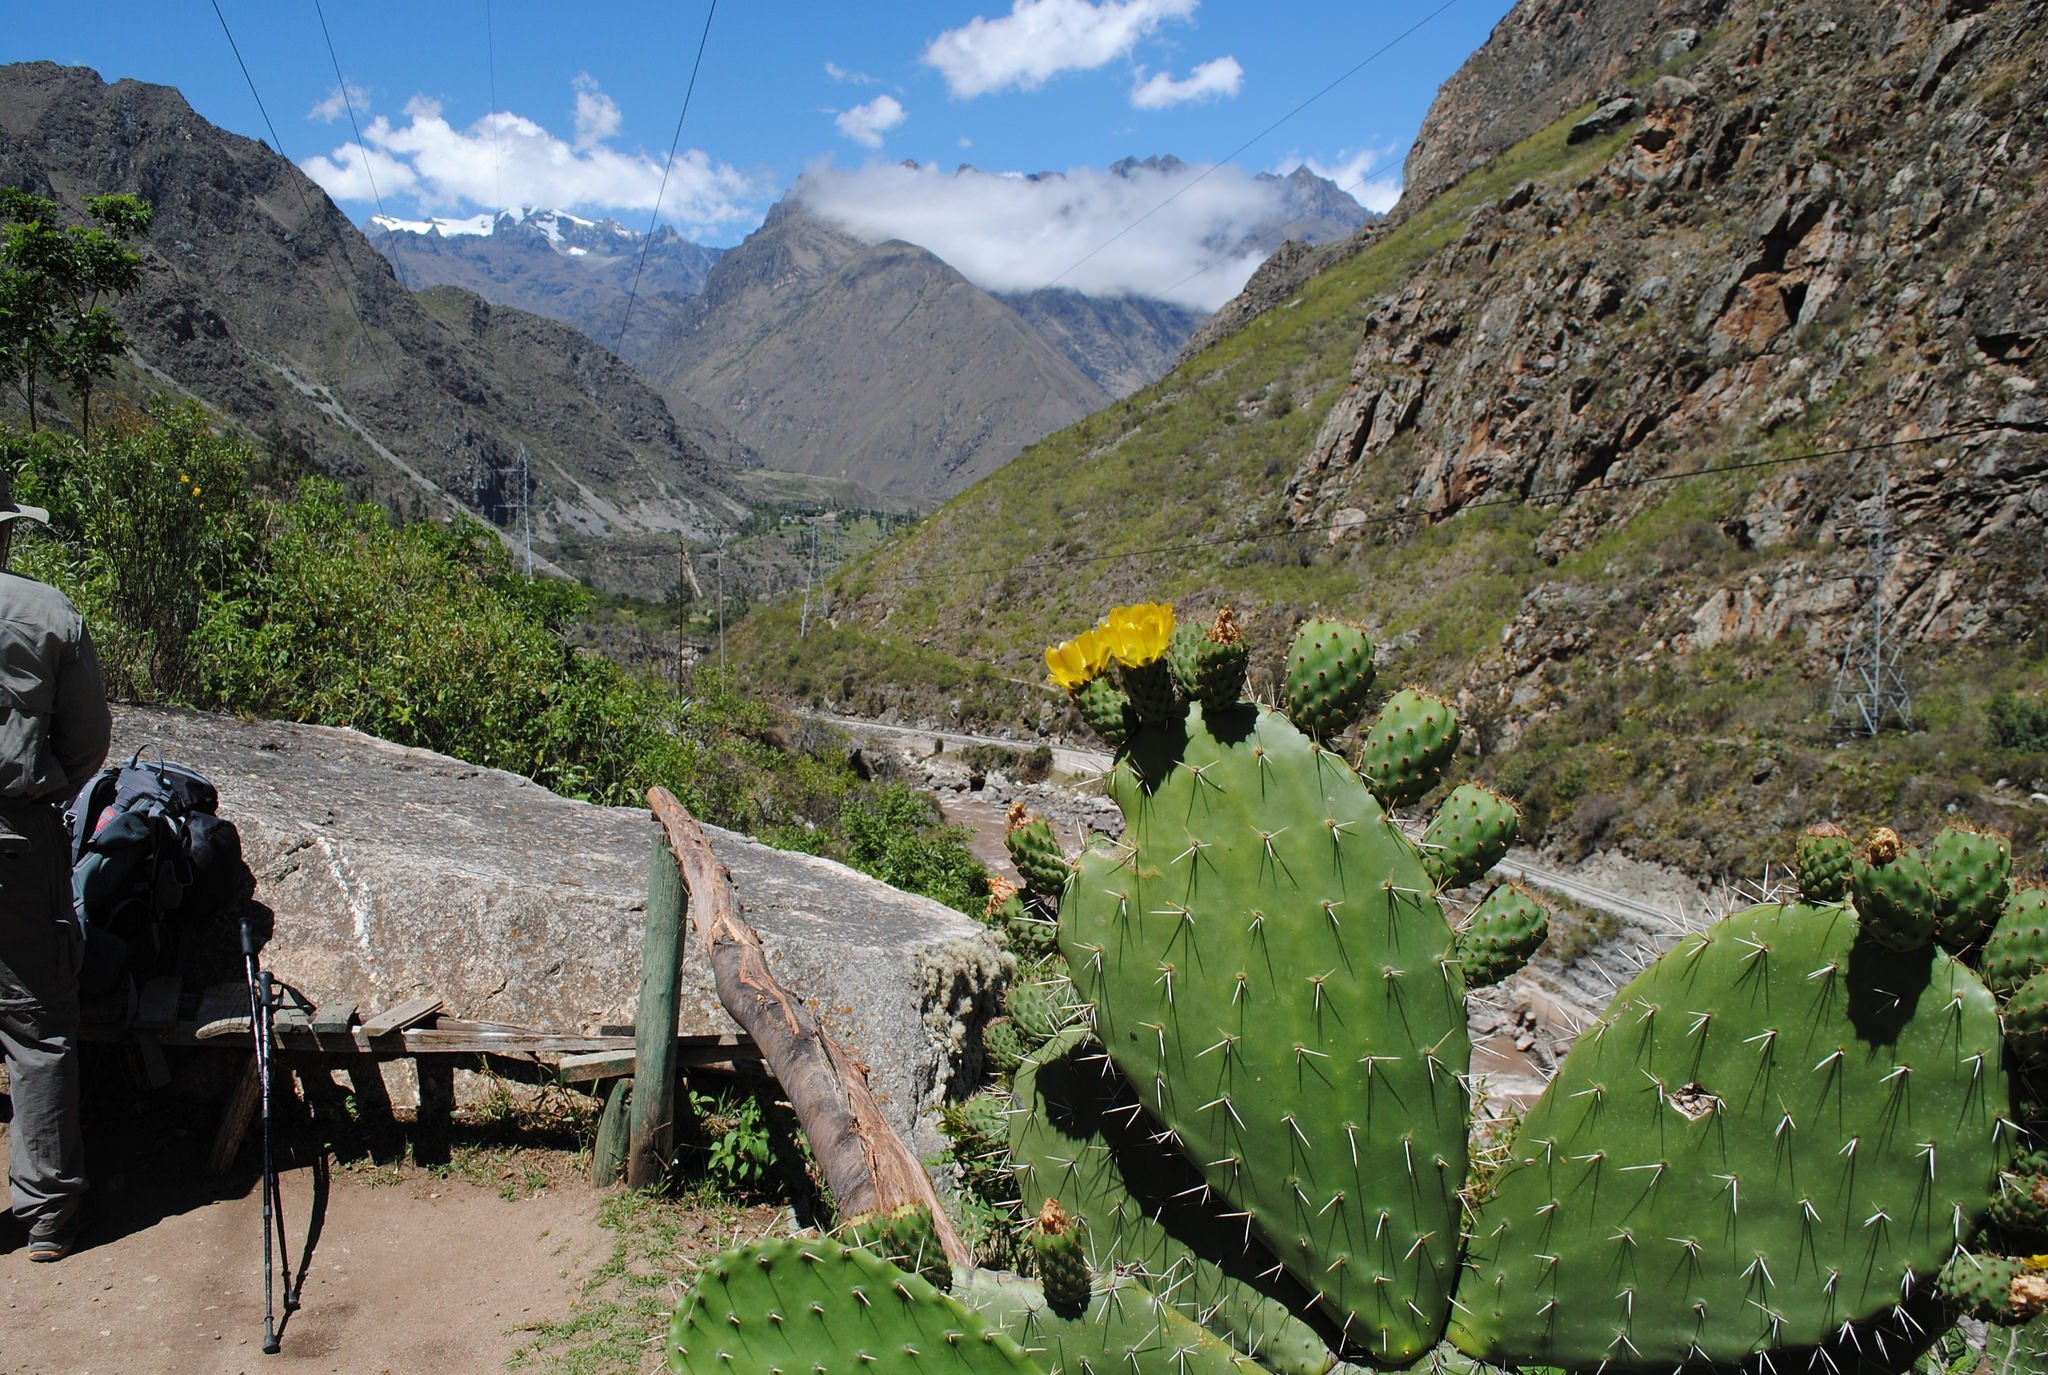
Along the trail, we saw many local people who were selling water in different resting spots or hauling food and goods on their donkeys.
There were also dogs and chickens scattered all over the place, but since we weren’t in the high mountains yet, we were still trekking around the outskirts of some farms and people’s homes.
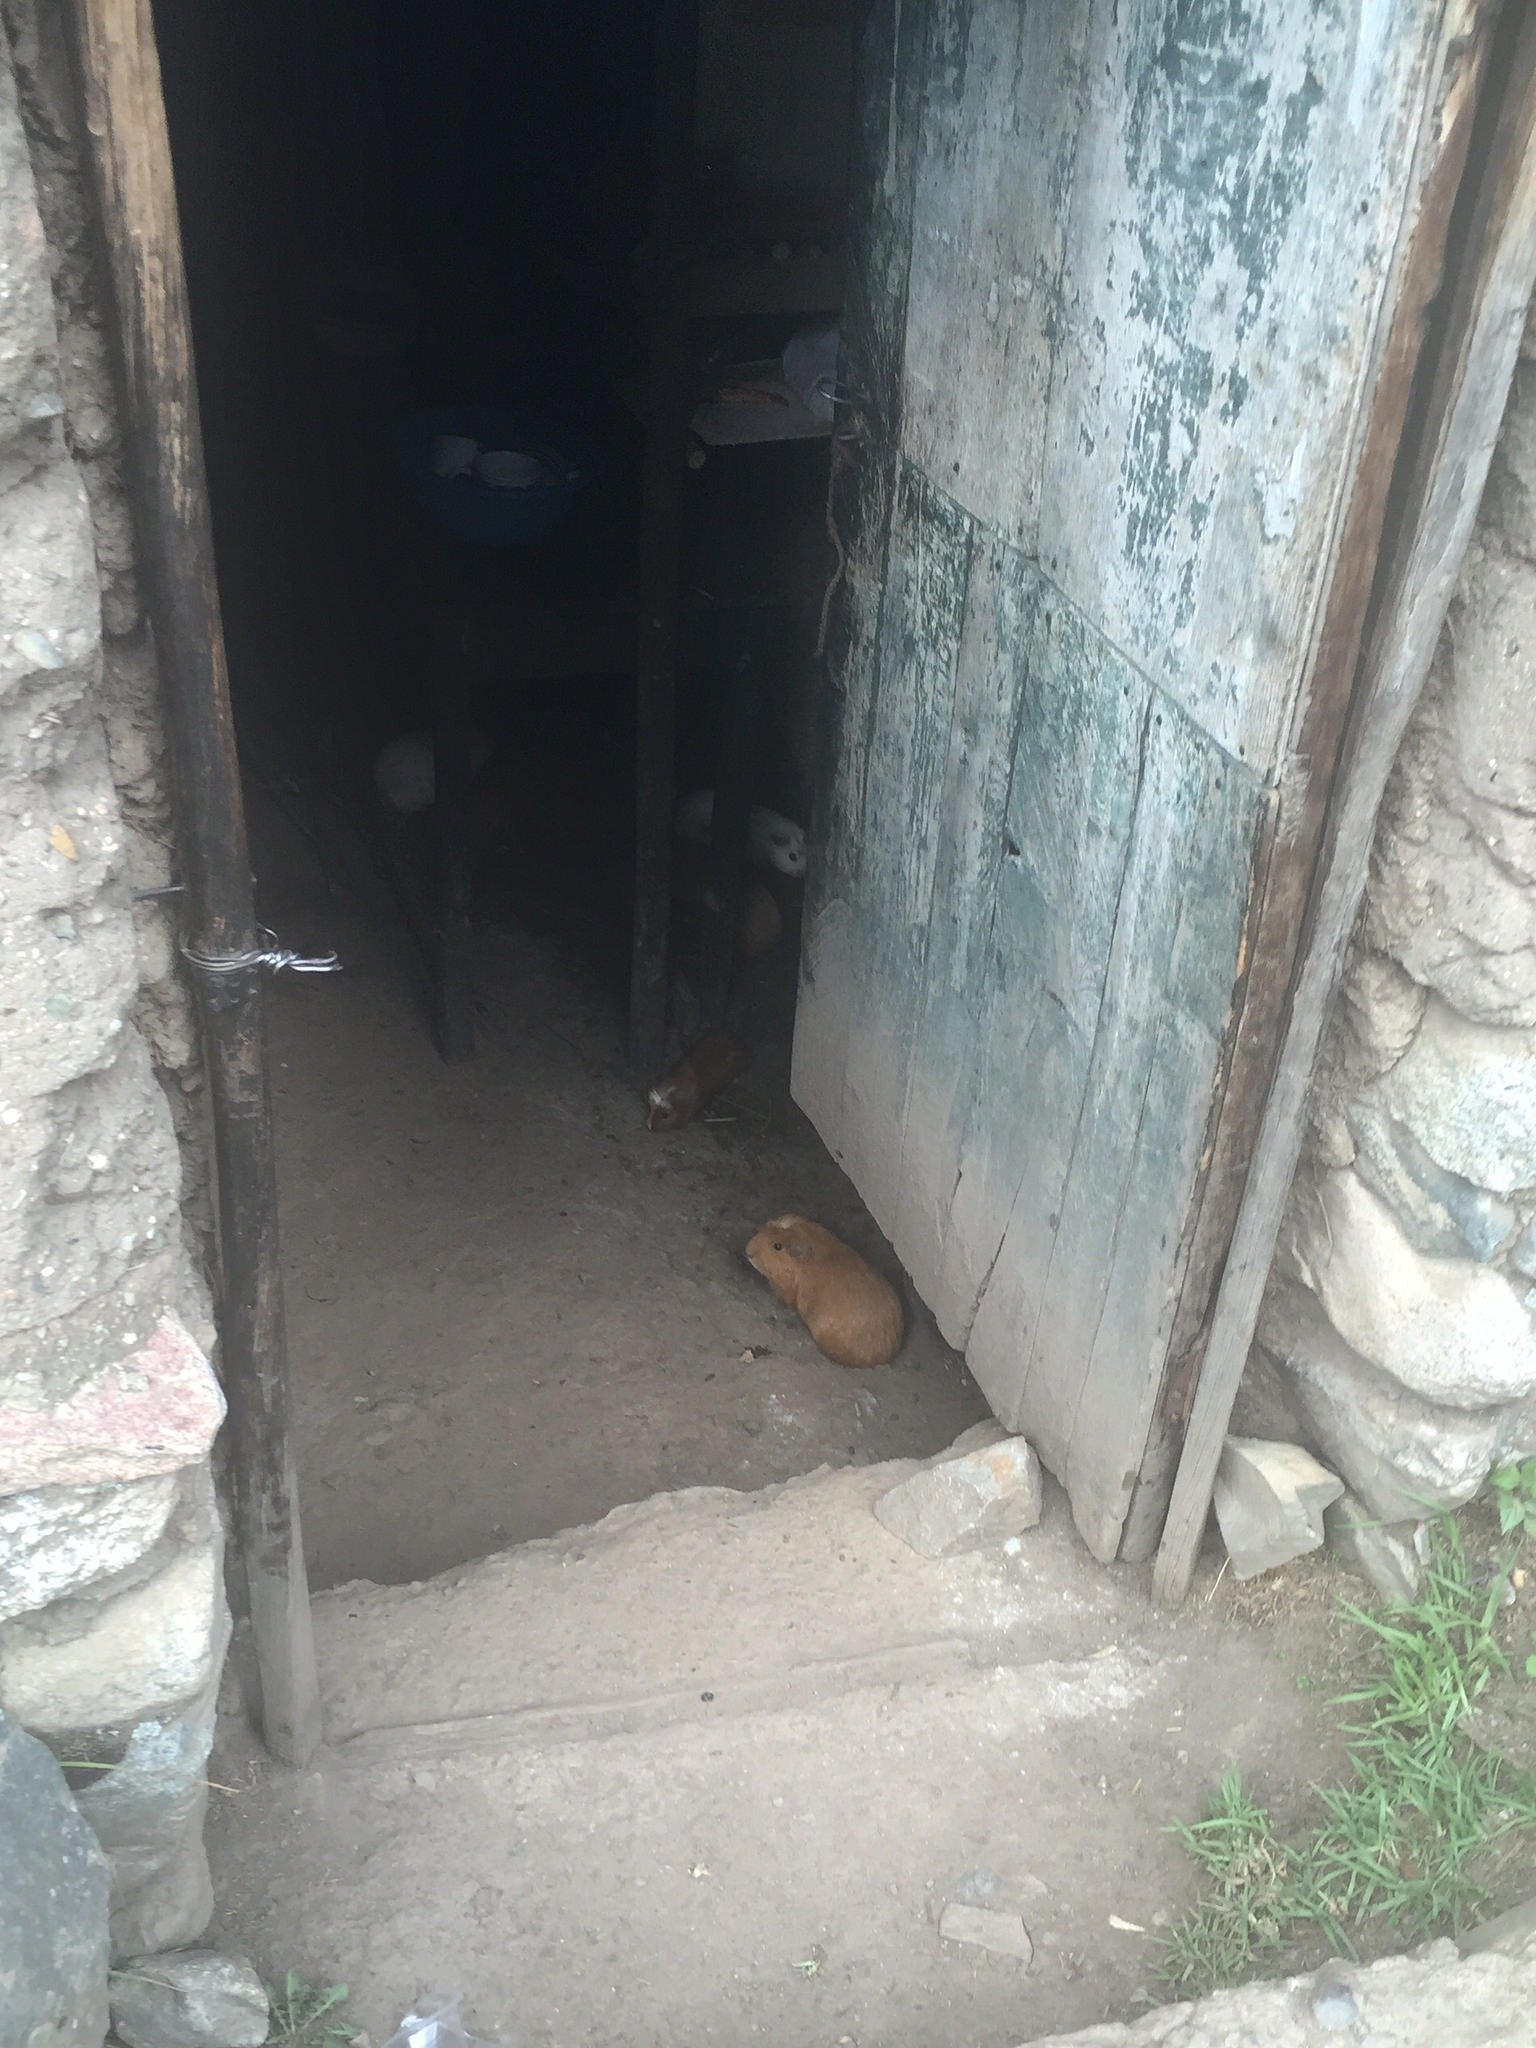
guinea pig in someone’s home!
The first campsite
The campsite we ended at on the first day was called Wayllabamba and was situated in somewhat of a valley with little farms nestled all around. We stayed on someone’s farm property and even saw some guinea pigs on the kitchen floor of their house.
Guinea pig is a delicacy in Peru. After another 4 course dinner, some fun chit-chat getting to know our fellow trekkers and guides, and a welcome and introduction to our porters, we had an early night to prep for Day 2, which was supposedly the hardest day!
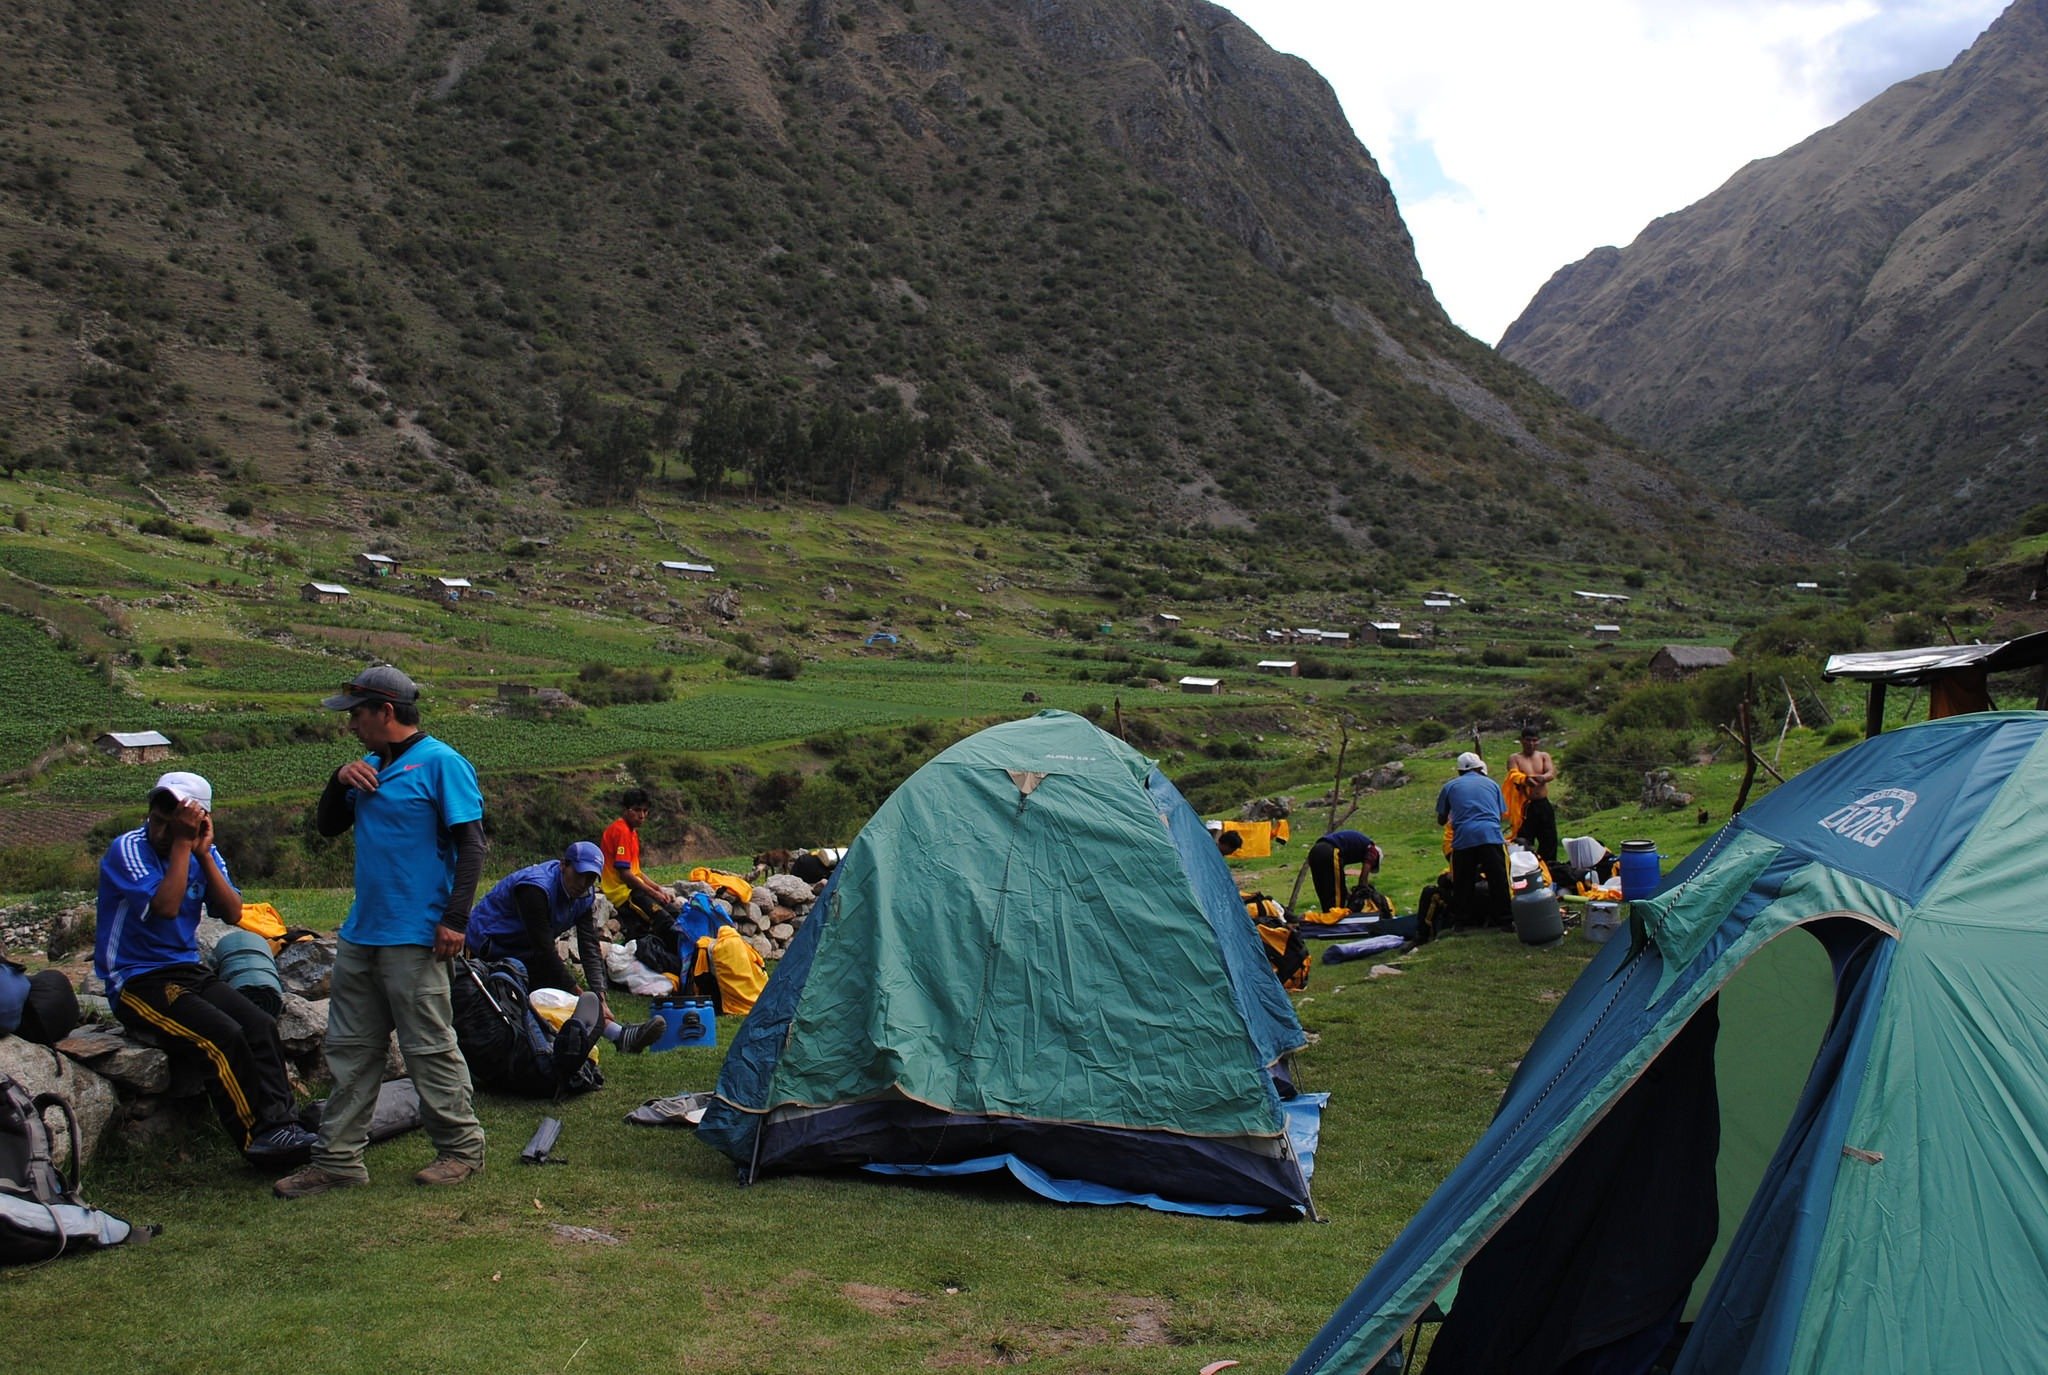
Our first campsite on day 1!
All in all, I call Day 1 a “Piece of Cake” compared to what was to come!


Day 2 on the Inca Trail
Trek from Wayllabamba to Pacaymay (hike through Dead Woman’s Pass) 6.8miles (11km)
The beginning of the trek
We were warned the night before by our guide Ernesto that the second day was the hardest day.
He explained we’d be going uphill for the majority of the day, and then immediately, once we were to reach Dead Woman’s Pass (the highest point in elevation on the trek, 13,828 feet), we’d have to hike on “Gringo steps” (small steps not meant for westerners large feet) downhill for 2 more hours. I was pretty nervous as I went to bed that night, thinking we’d be going to the highest pass and that it had the name Dead Woman’s Pass, but realized I had no other option. It WAS happening, and it was time to strap on my party pants!

We woke up to a knock on our tent at 5:30 a.m. with porters handing us a hot drink of coca tea to get us ready for the change in elevation that day.
It’s a great wake-up call if you ask me! Breakfast was once again amazing, and after we ate, we started trekking at 7 a.m.
The first part of the trek was a pretty steep incline uphill but somewhat manageable.
We stopped at a small Inca Ruin earlier in the morning, and after that, we noticed the trek started to go straight uphill. It was really challenging, but we knew it was only going to get harder after our break to hike up to Dead Woman’s Pass.
Taking a break
We hit the break site, and the views were incredible!! Local ladies were selling water and snacks, and our guide told us that this was the last time we’d get water from local ladies selling water bottles and that the rest of the water would be boiled and given to us during meals.
The porters set up a tent for us (it was HOT outside), and we had snacks under the shade of the tent and caught our breath.
I was exhausted already, but the break helped me gather my bearings and get my mindset to climb an even tougher part of the trek.


Hike up Dead Woman’s Pass
After the short break for snacks was the most dreaded part of the trail.
Uphill and vertical for what seemed like ages. We started up the hill, or should I say massive mountain, and hiked up inca steps up the cliff the entire time.
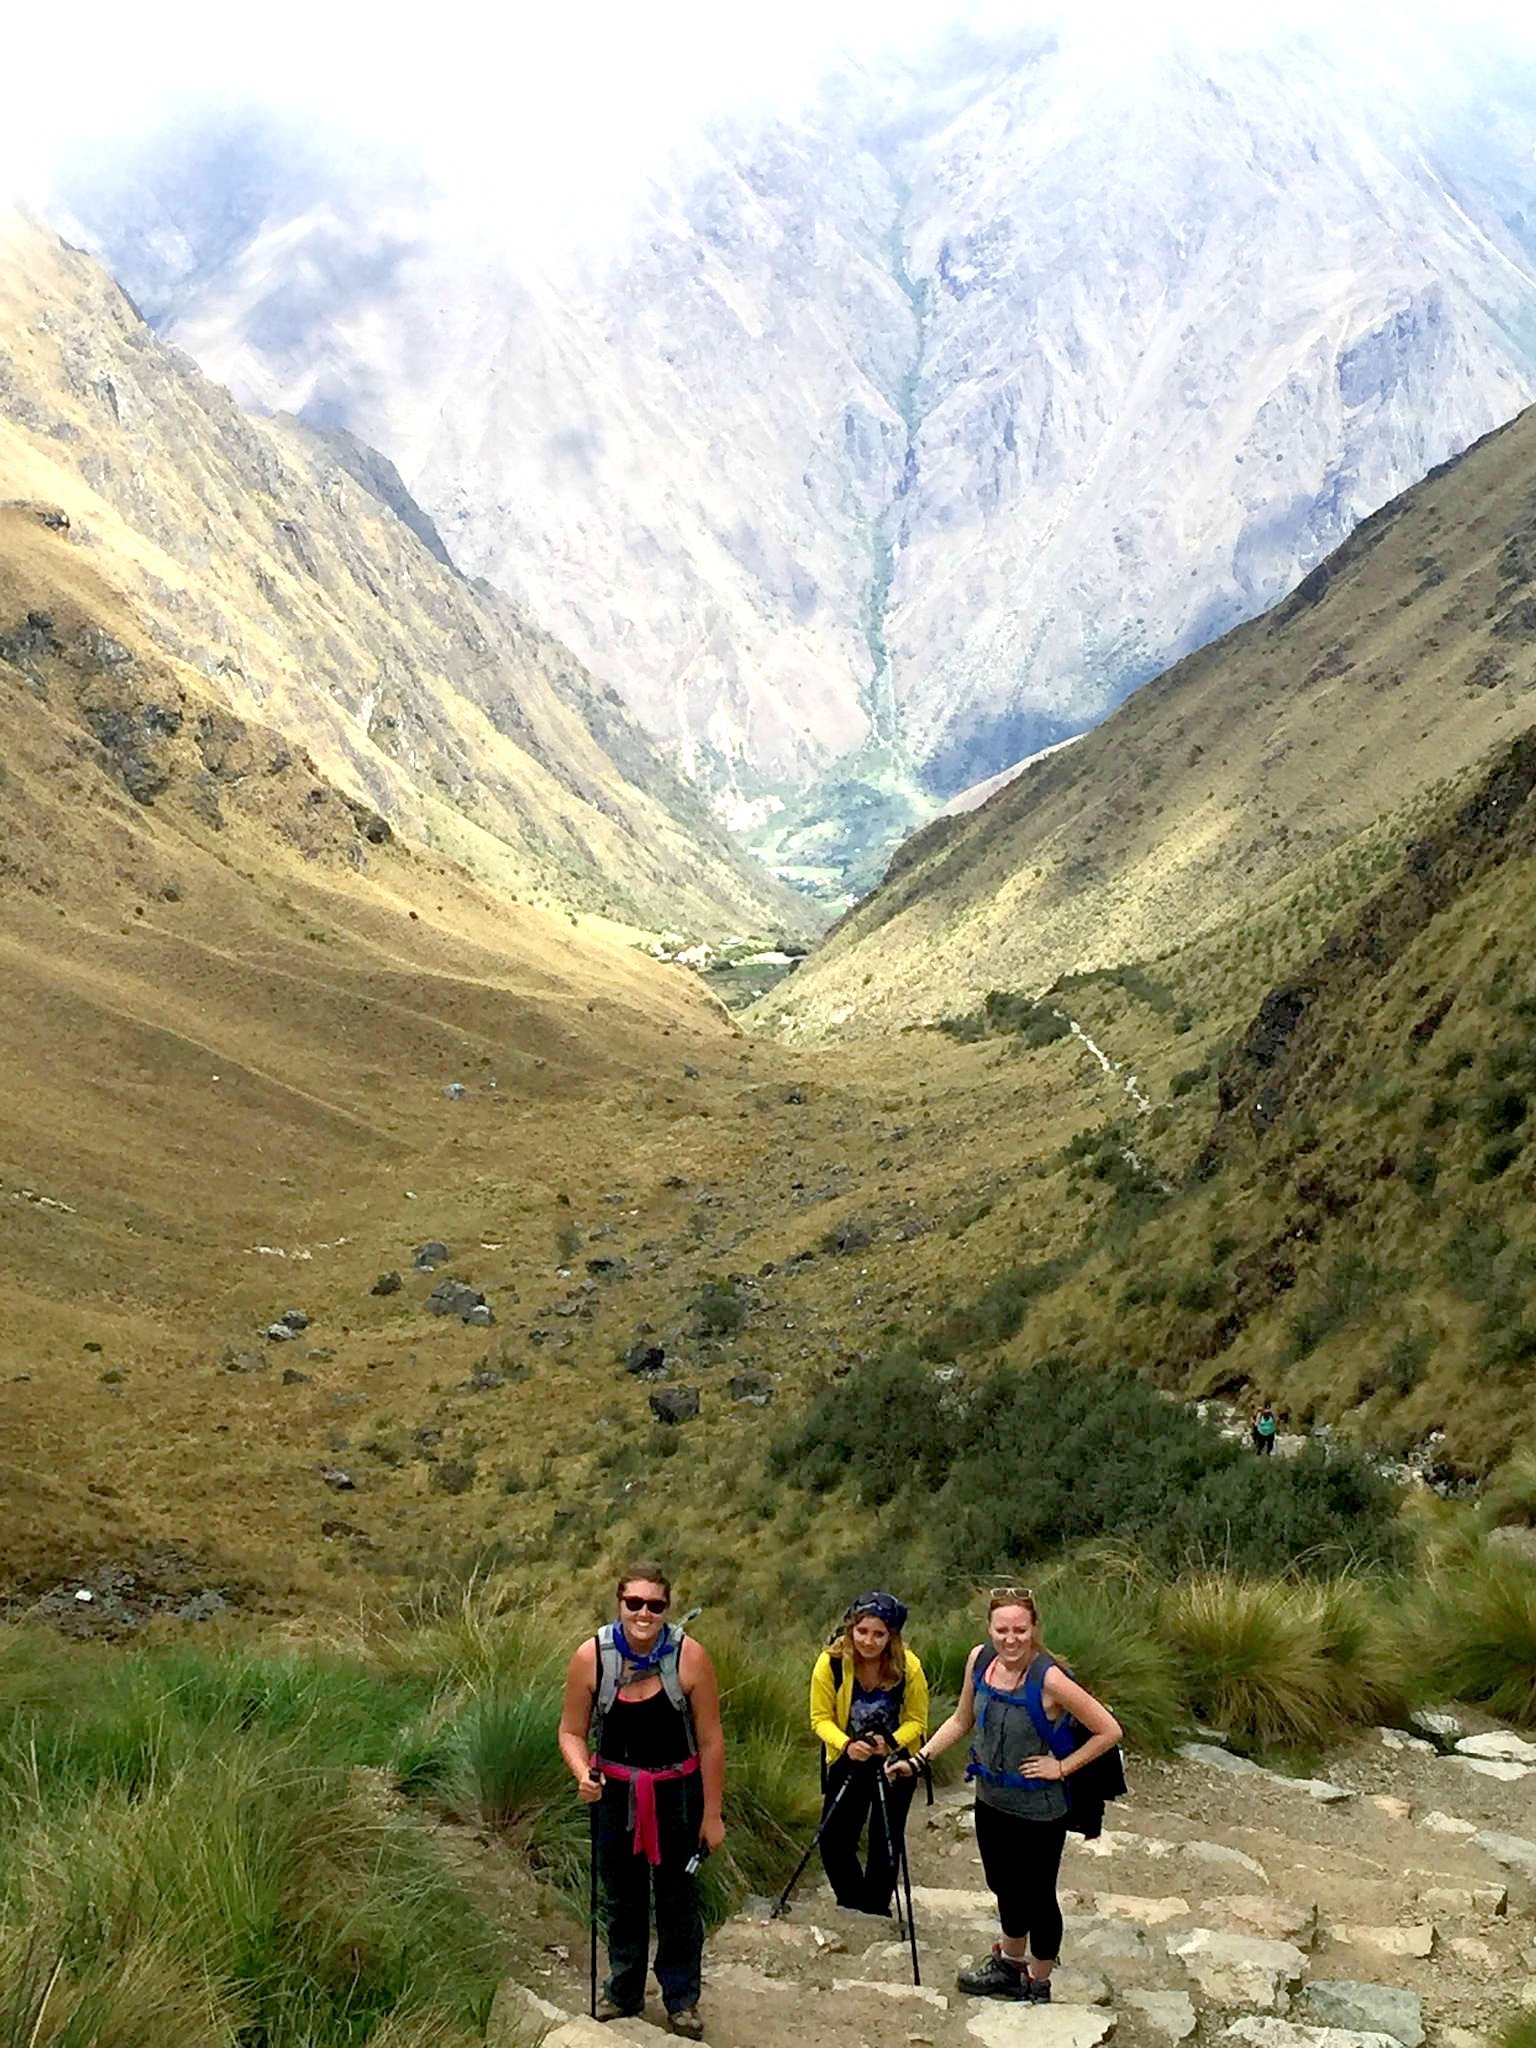
Luckily, I fell in line with 2 girls from my trek (1 Canadian and 1 British girl), and we took it slow together and stopped every 30 feet or so. The altitude really started kicking in right after we left the break spot, and every few steps, we’d have to stop and catch our breath, eat some snacks or coca candies, and sit down on rocks.
I don’t know if I’ve ever done anything so physically demanding in my life, but I told myself that any time I got tired or out of breath, I could look around and enjoy the view instead of forcing myself to keep going.
That in itself pushed me along. It took a while to get up to the top, and it took A LOT of willpower, but we tried to be lighthearted and make jokes and take pictures the whole time to make the trek up more enjoyable.


The top of Dead Woman Pass
Finally, we reached the top of Dead Woman’s Pass! It felt like it took a million years to get up there, but boy, did it feel good to make it to the top.
The fog had rolled in right as we got to the top, so it was extremely cloudy/rainy and foggy, and we all bundled up in our jackets and paused for a quick minute to get photos at the Summit before our 2-hour trip downhill.


The hike to our second campsite
Then it was downhill for about 2 hours, and man was it hard! They don’t call it ‘gringo killer’ for nothing. It was straight downhill on steps for what seemed like years. I was extremely grateful for my trekking poles at this point because they supported me on the different jagged rocks and small steps. Whereas hiking to the top took major endurance, hiking down took agility. I can’t tell you which one I hated more 🙂
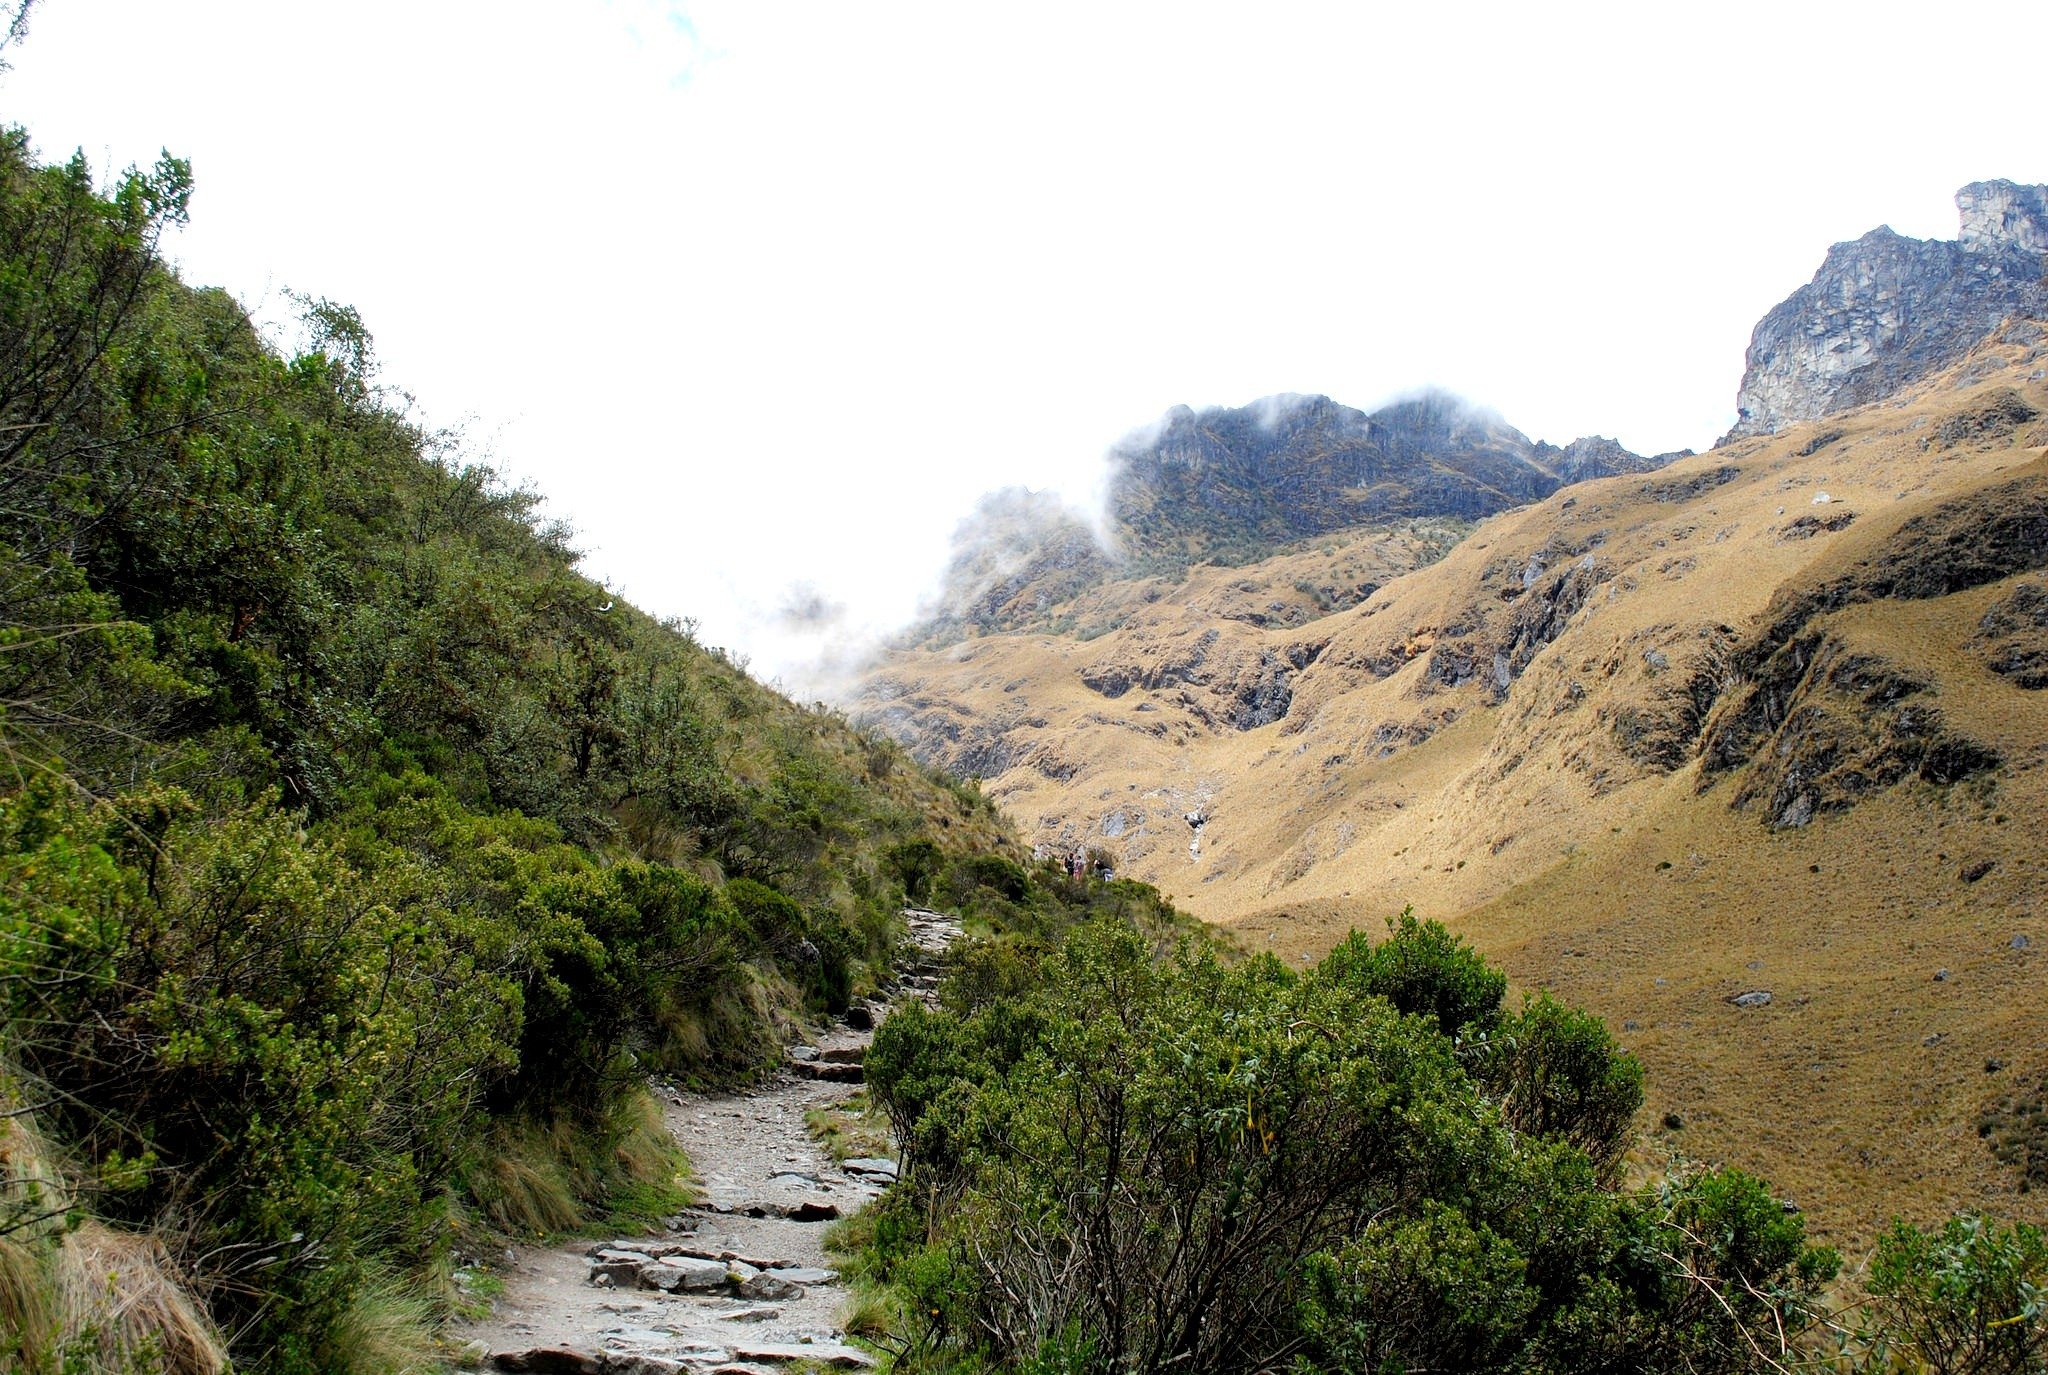
The good news though? The views on the way were INCREDIBLE!! Hiking through places that not many people get to see in their lifetime was what kept me going the entire time.
We finally made it to our campsite for a late lunch, and all of us practically died. We ate lunch, and all immediately went and took naps in the tent until dinner.


A map of what we did on Day 2
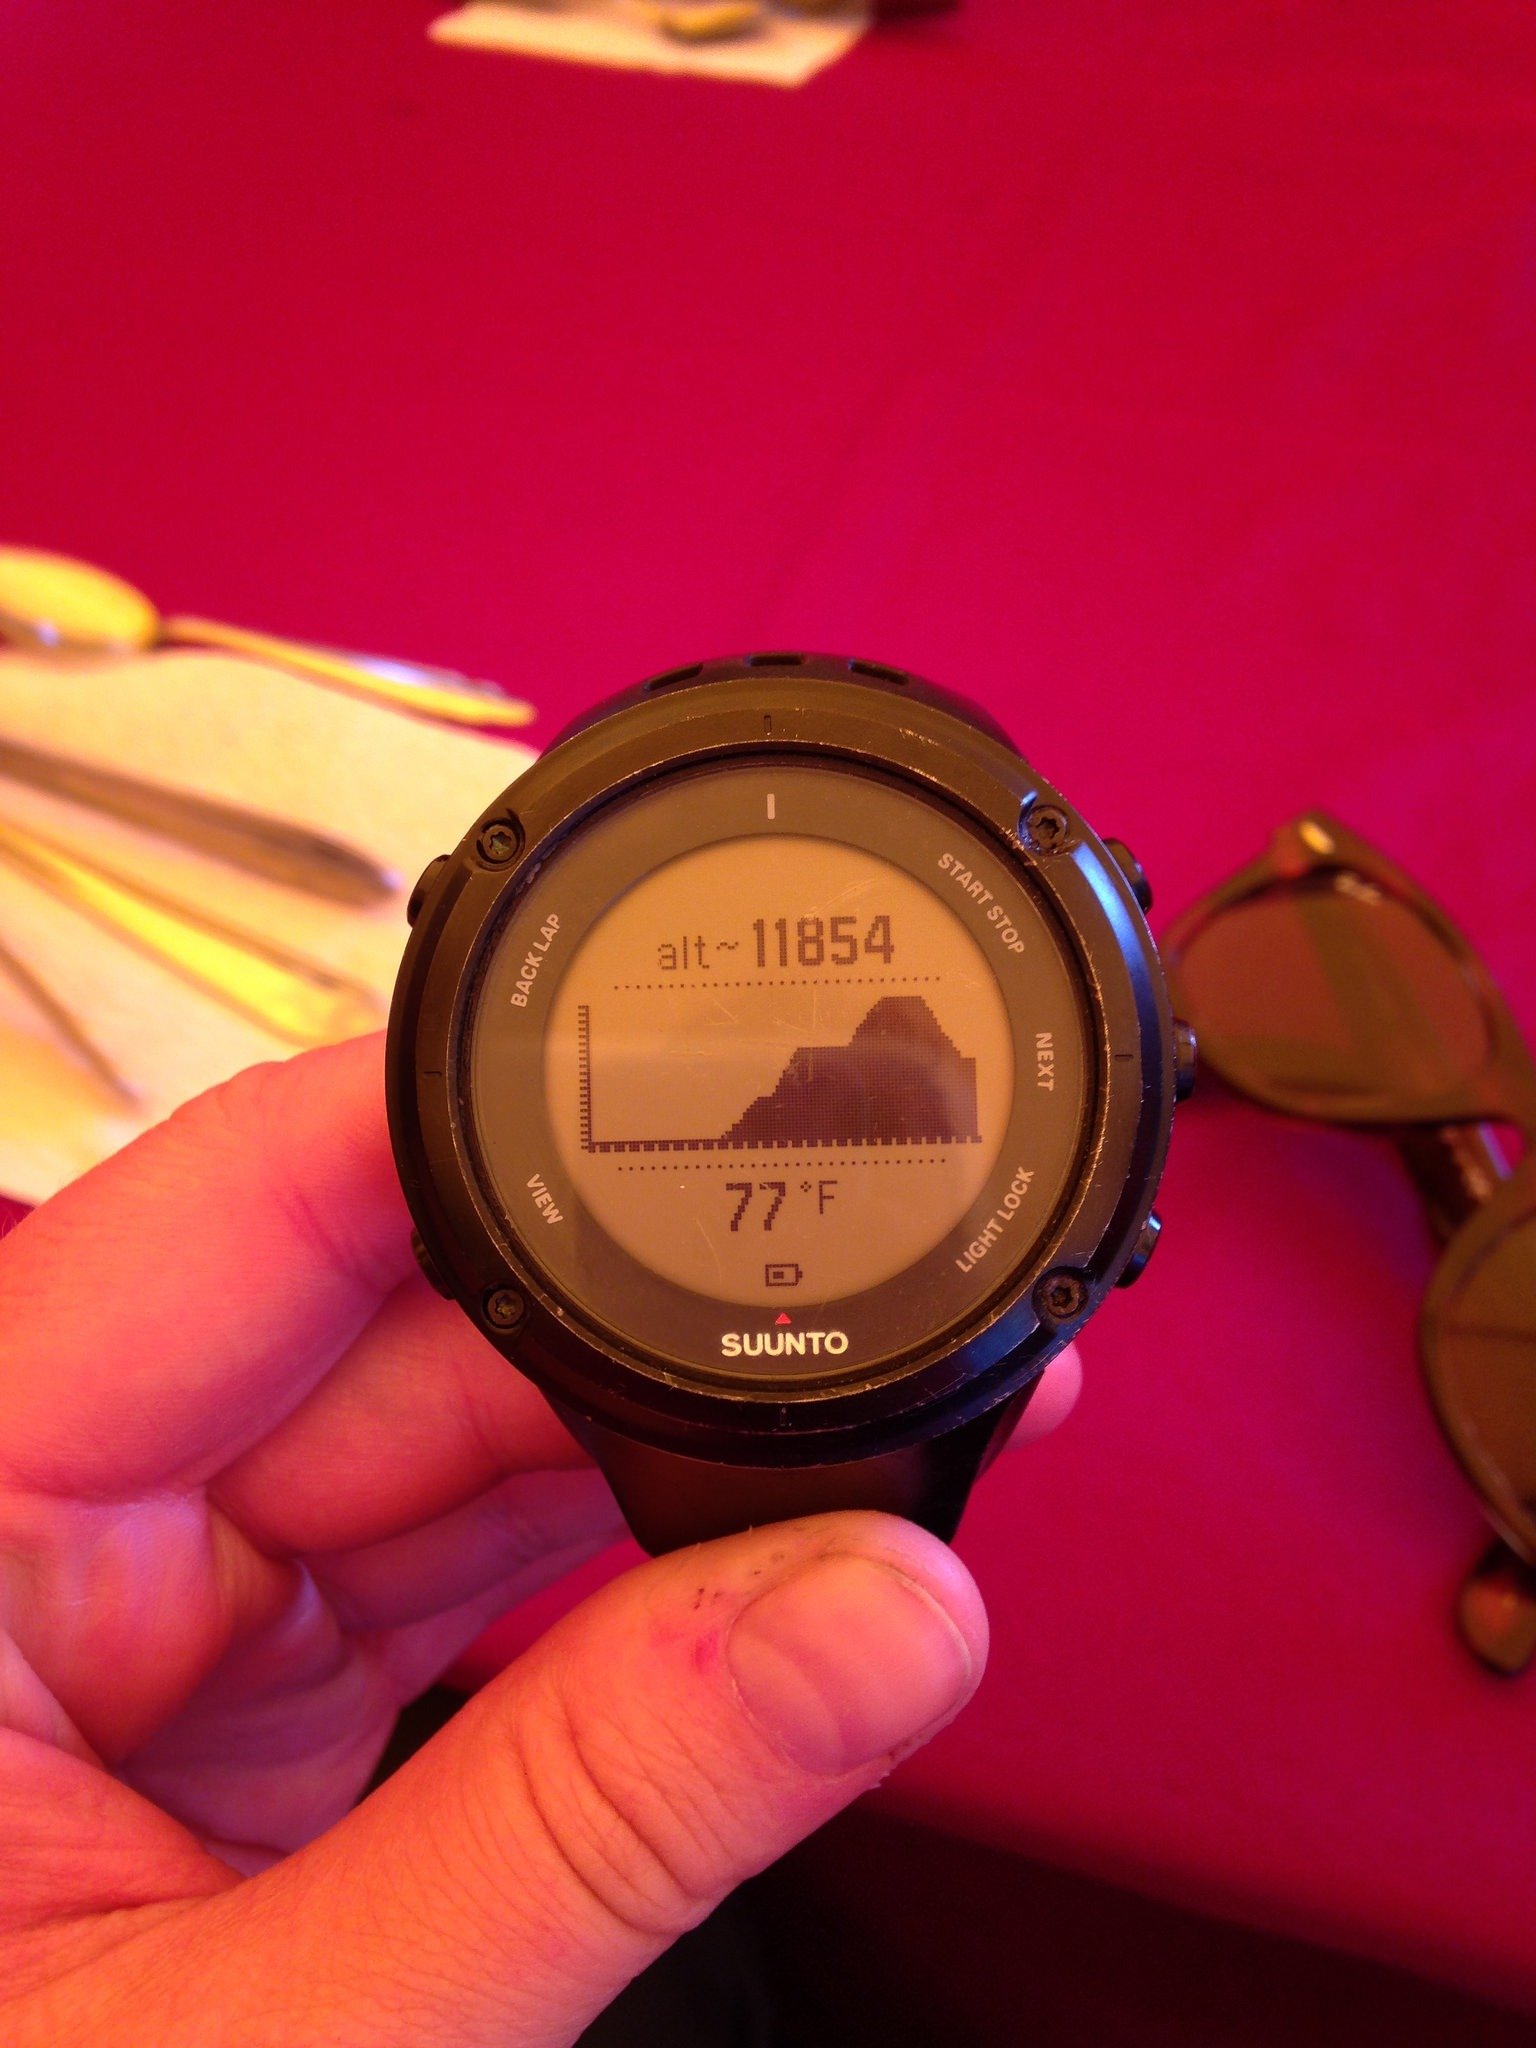
We slept at an elevation of 11,800 that night. I talk a lot above about how much I died and how tired I was, but it was all SO SO worth it! The pros definitely outweighed the cons, and I don’t want to discourage anyone who wants to do the hike. Yes, the 2nd day is as hard as everyone says, but it’s an experience that you really can’t top!

Day 3 on the Inca Trail
Trek from Pacaymayo to Wiñaywayna | 10 miles
The beginning of the trek
Day 3 was arguably less hard than the Day 1 & 2, but much longer and more tiresome.
On this day, we woke up at 5 a.m. from our beautiful campsite that was tucked underneath a waterfall and little stream.
I had a seriously hard time getting out of the tent and was feeling extremely sore in the morning, but most of all, I was dreading walking to the bathroom because they were disgusting…probably the worst ones I’d seen on the trail.
We were told that today was going to be beautiful if the clouds parted, and we’d get to see a lot of amazing Inca sites.
Stopping at Inca archeological sites
We started the trek uphill for 2 hours and stopped at our first small Inca site. The views were great, and it was fun to see we were getting closer to Machu Picchu from the amount of Inca sites we started to see!
After continuing to hike uphill, we ended at another Inca site called Sayacmarca, which was tucked into the mountain and only accessible by climbing up 99 narrow steps.
Unfortunately, it was a little rainy and foggy, so we couldn’t see the views from the site, but it was interesting to hear how they mummified the Incas and was fun to look at the different rooms. My legs were SHOT, so coming down from the narrow steps was a bit difficult!

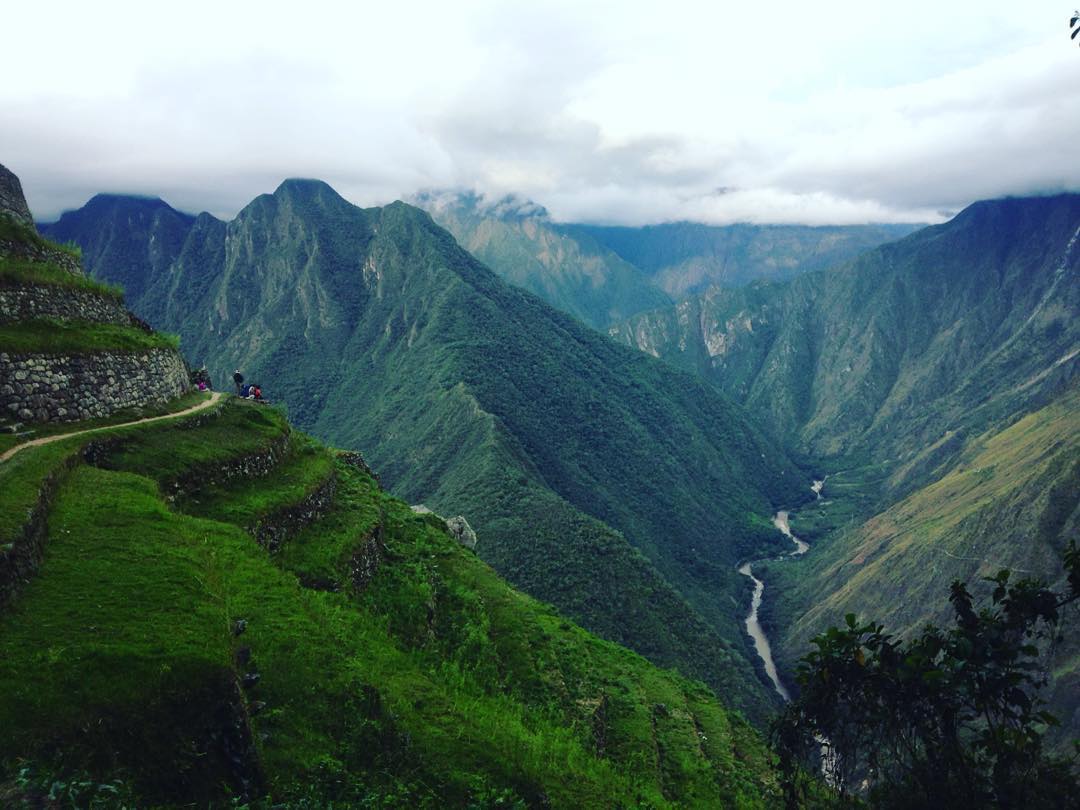
After a little bit longer, the sun started shining, and we had beautiful views of the valley. This next part of the trail was gorgeous!
We picked up again on the rocky Inca trail on the side of the mountain and watched the scenery continue to change. I thought today would be a little easier, but there were a lot of up and downhill steep parts, and my legs were shaking all day.

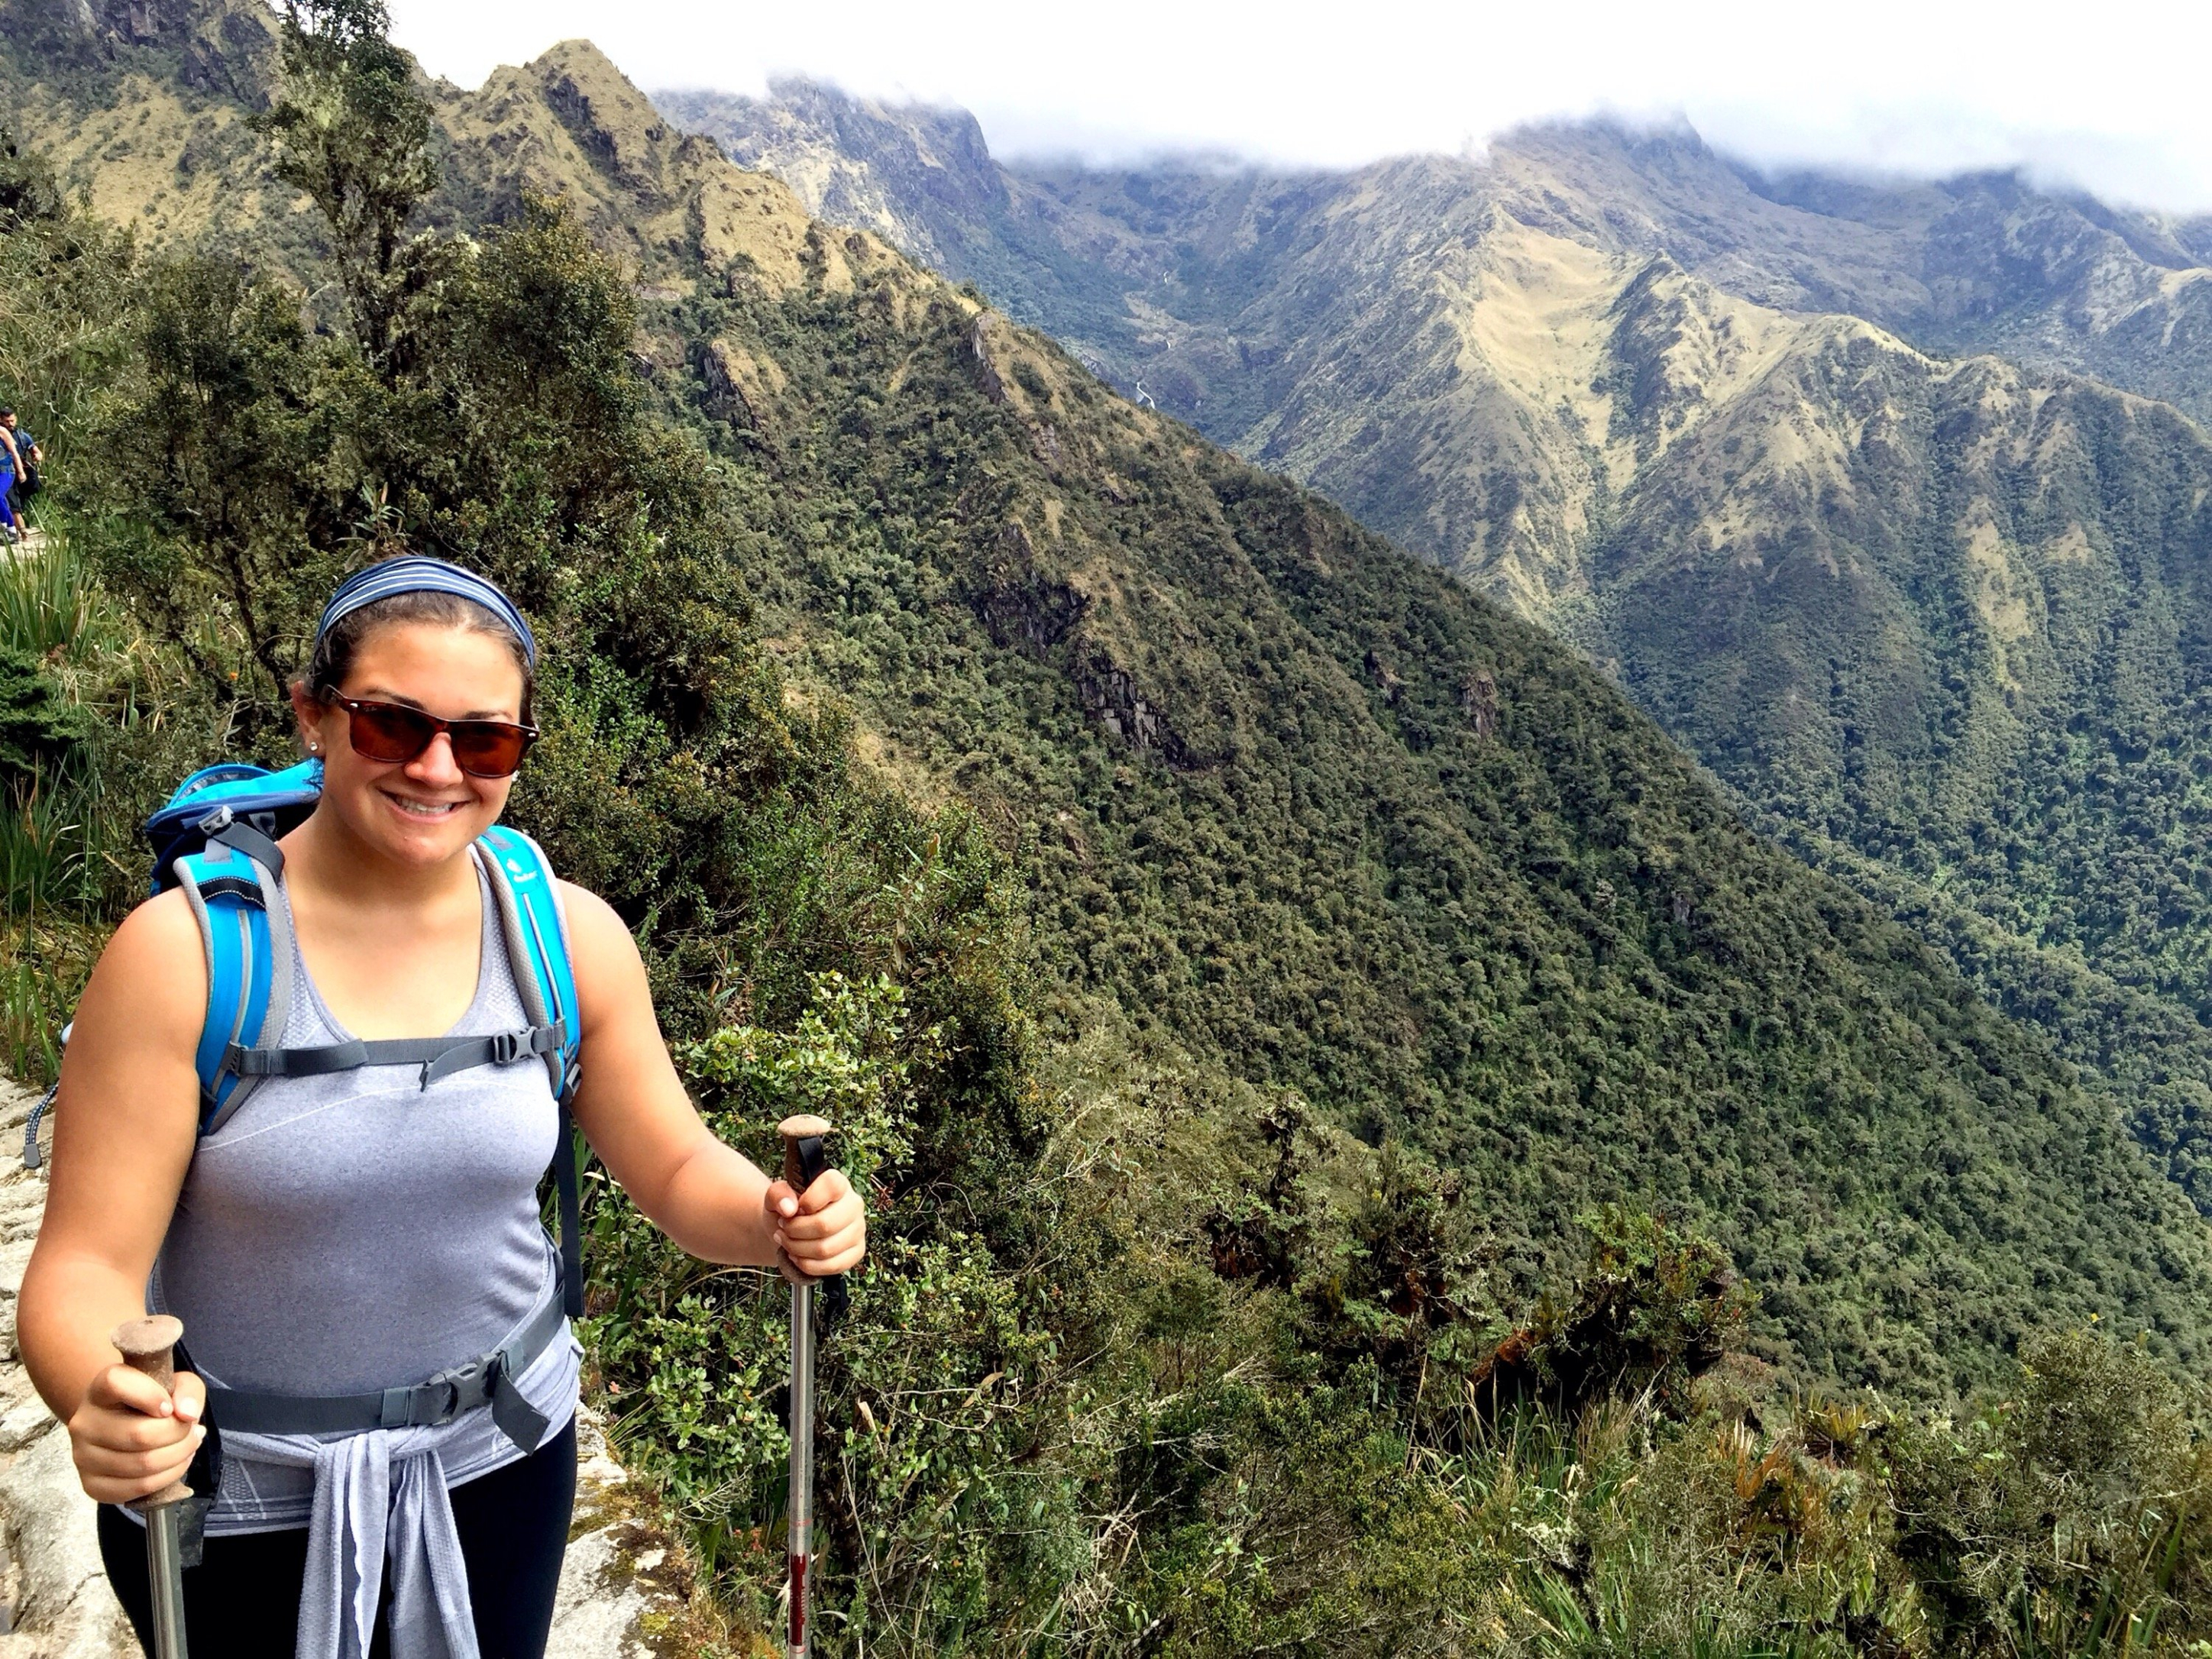
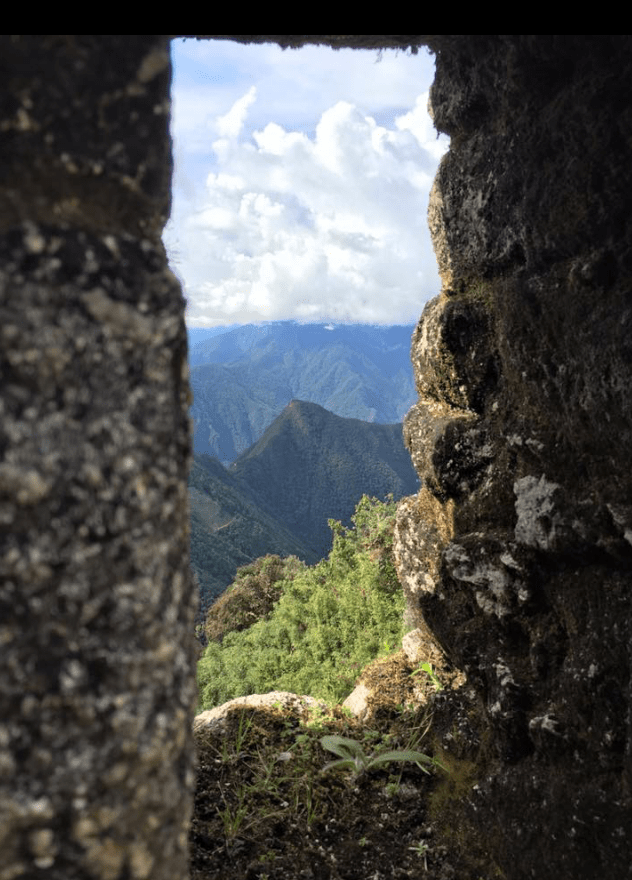
Gorgeous viewpoints
We kept trekking uphill and finally hit the 2nd highest peak of our trek (the highest was Dead Woman’s Pass at 13,828 ft), but this one was called Phuyupatamarka.
The views up here were phenomenal, and as we were hiking, we could tell we were getting closer and closer to Machu Picchu!
The scenery started to turn green and lush with jungle plants, which was a nice change of pace from the desert we hiked in the 2 days before. It’s also known as hiking through the cloud forest!
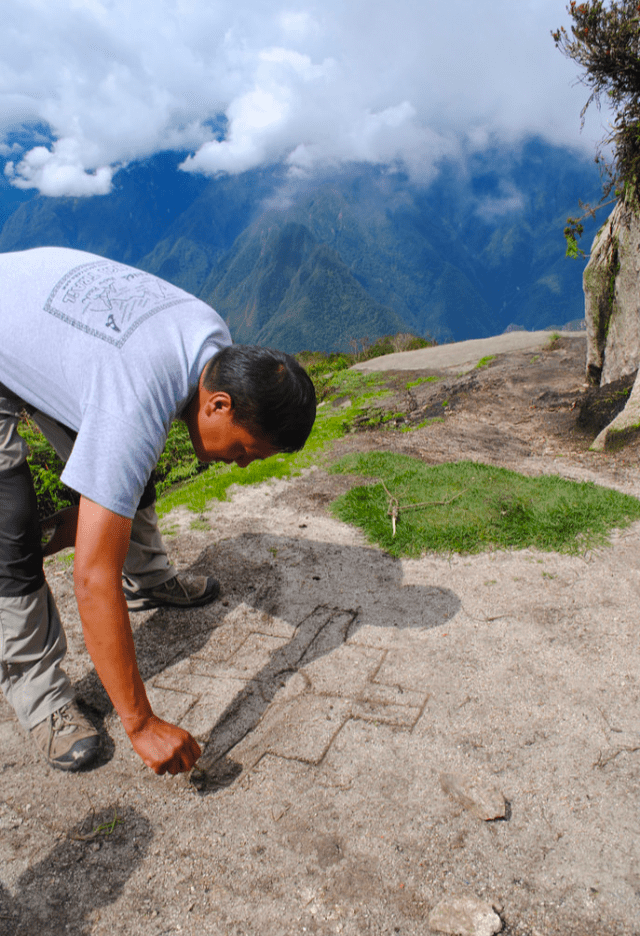
The views up here were breathtaking, and we got some great photo ops. Our tour guide, Ernesto, took us up to an even higher point and explained the Andean cross symbology, explained the different languages of Peru (Quechua is the local language), and did another coca ceremony to Pachamama.
Wiñay Wayna was one of the prettiest views I’ve ever seen, and the best part was that we could see the back of Machu Picchu mountain from the top!


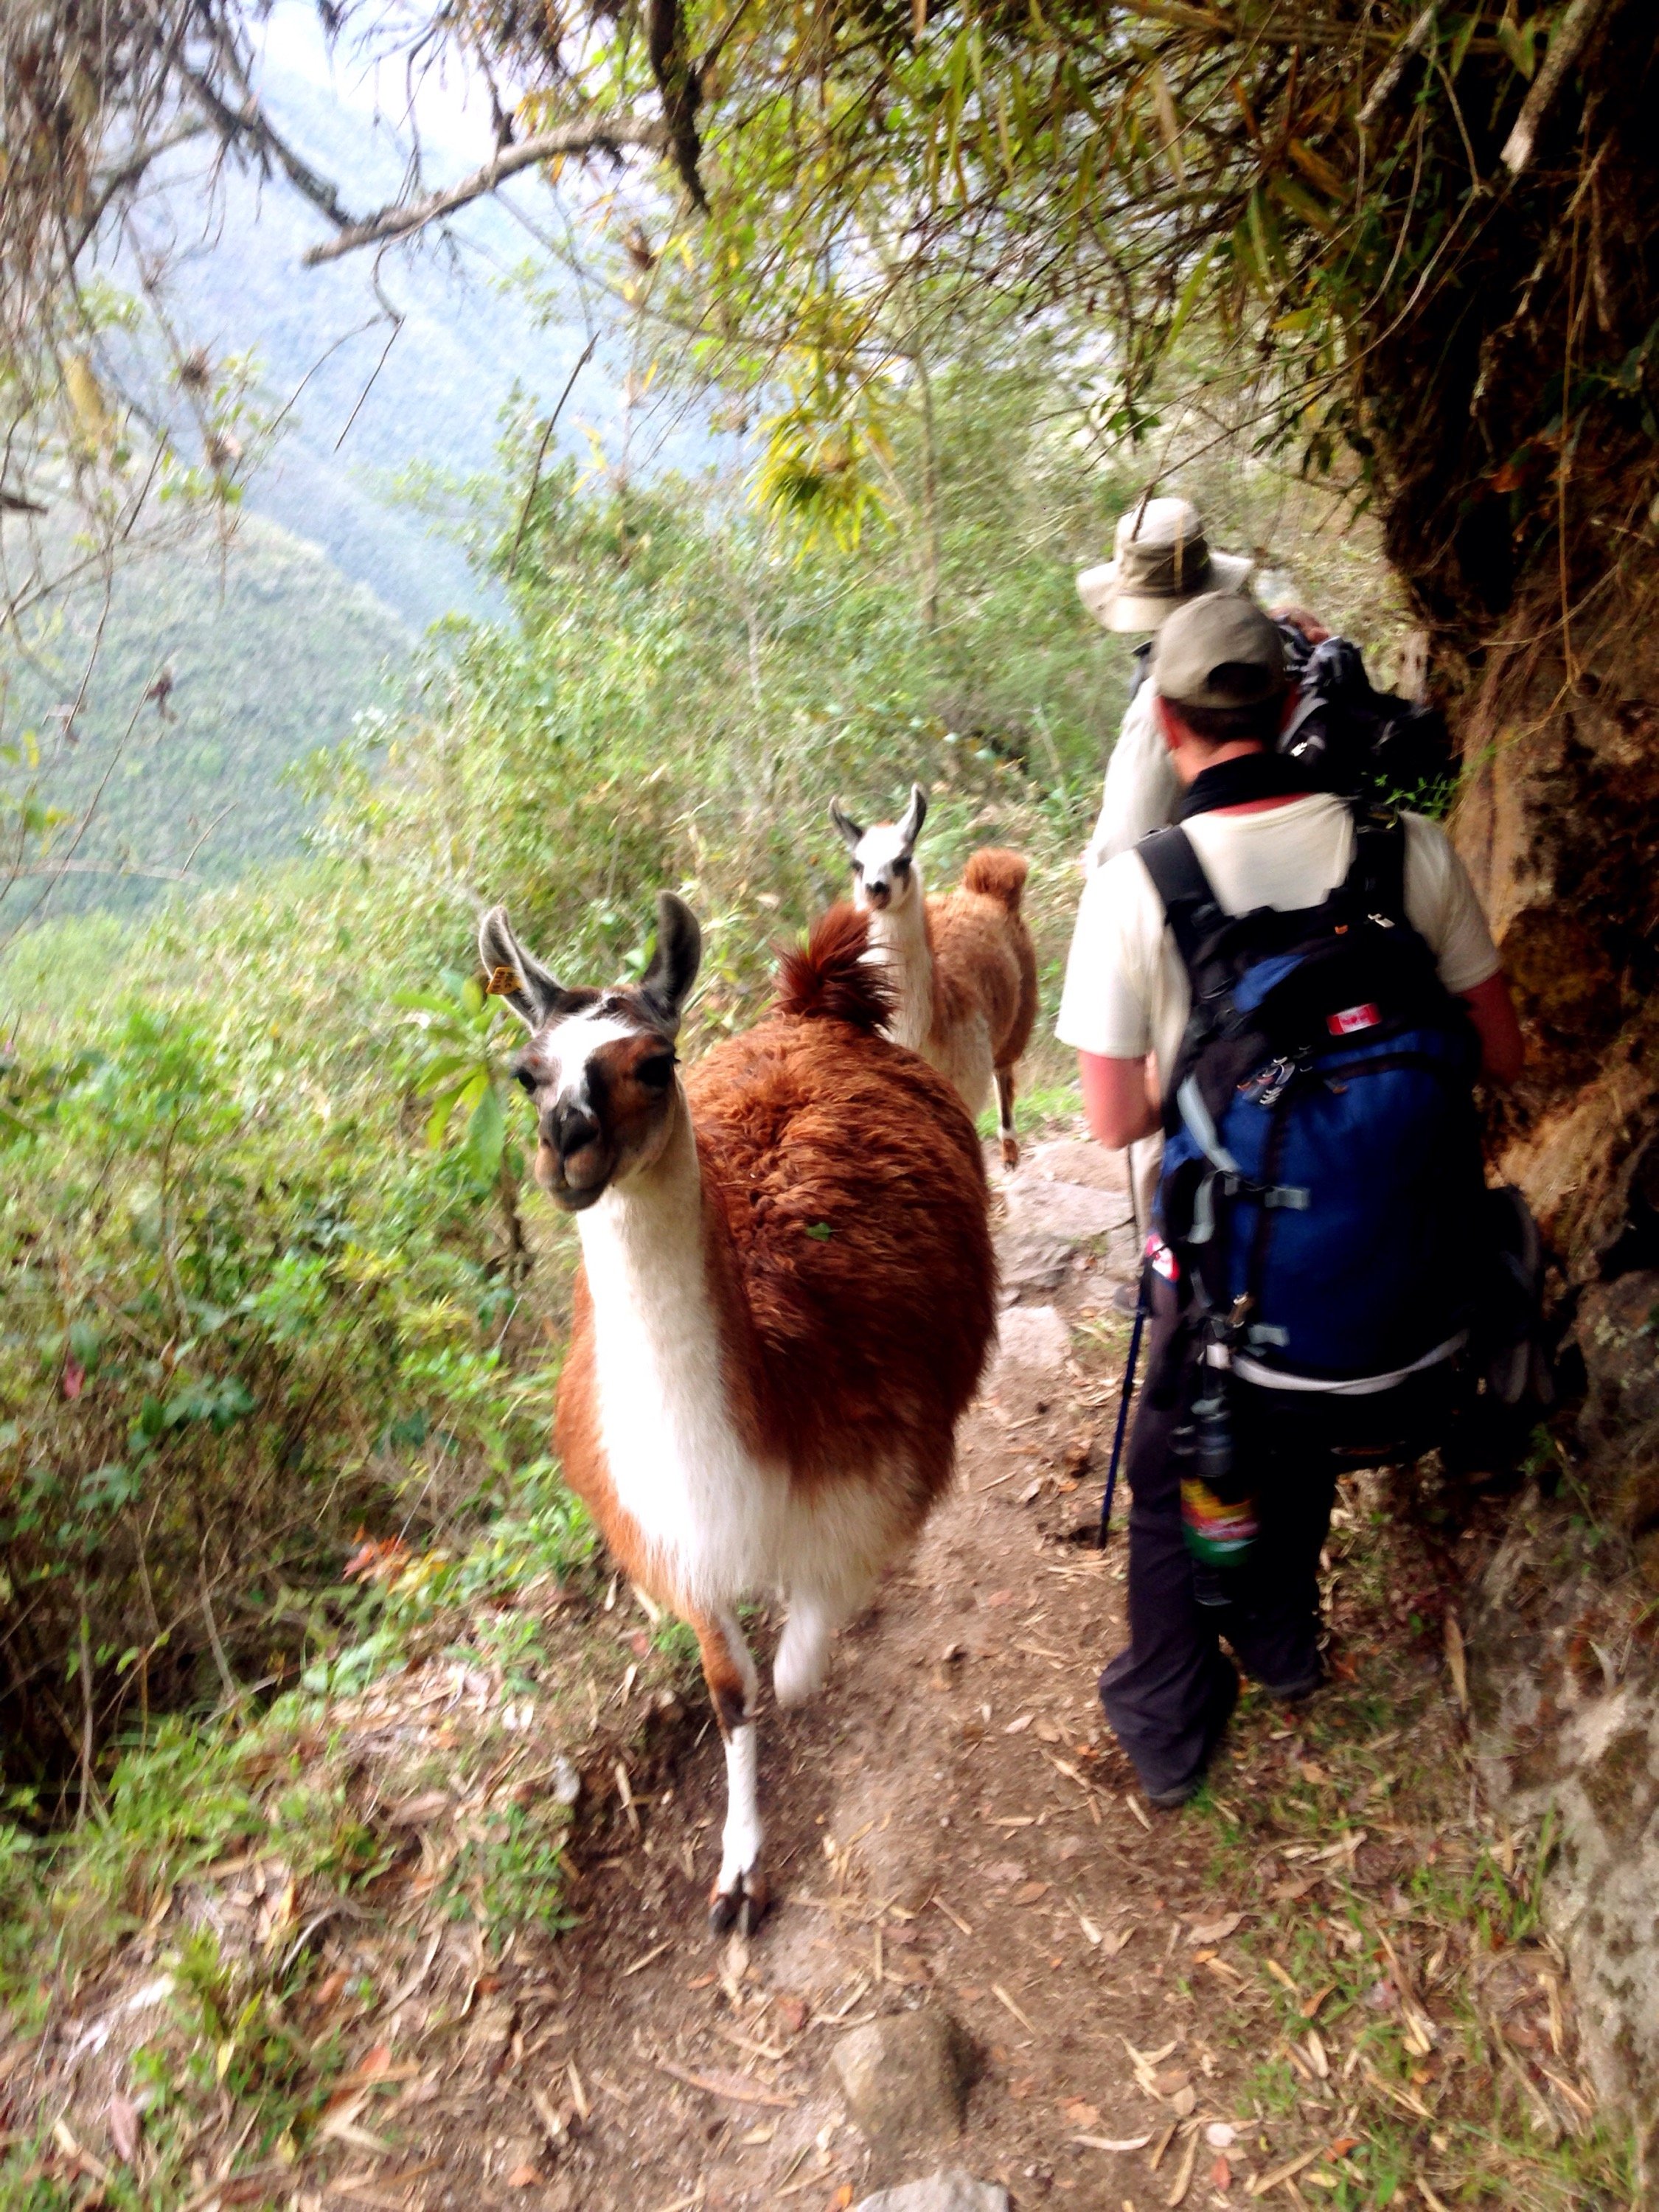
Lunch stop and Gringo Killer steps
Finally, it was time for lunch, and we stopped and saw a few llamas at our lunch spot. The last part of the hike was brutal, and they call it the ‘Gringo Killer’ because it’s tiny steps on a steep downhill for 2 full hours.
After this entire day, plus the day before, my legs were ready to give out on me. I was so tired! I could see the sun terraces right under us, though, and knew we were so close!
Unfortunately, this was much farther than I thought, but when we came to Winay-Wayna sun terraces and ancient ruins, they were SO worth it!! More awesome views and more llamas made me so happy!
The last campsite
Finally, we made it to our campsite on the last night of the trek. The porters had a little ceremony for us; we tipped them, and they even made us a cake!
I loved having the porters there. Their jobs are SO hard, but the ones on our trek seemed to be treated really well and seemed to enjoy themselves! How they managed to make a cake on the trail blew my mind, but practically everything they did amazed me!
We were so happy we made it to that final campsite and went to bed excited for Machu Picchu the next morning! Wake-up call at 3:30 a.m. on Day 4!
Related Post: 10 Amazing Sites You’ll See Only If You Hike the Inca Trail
Day 4 on the Inca Trail
Hiking to Machu Picchu!
The beginning of the trek
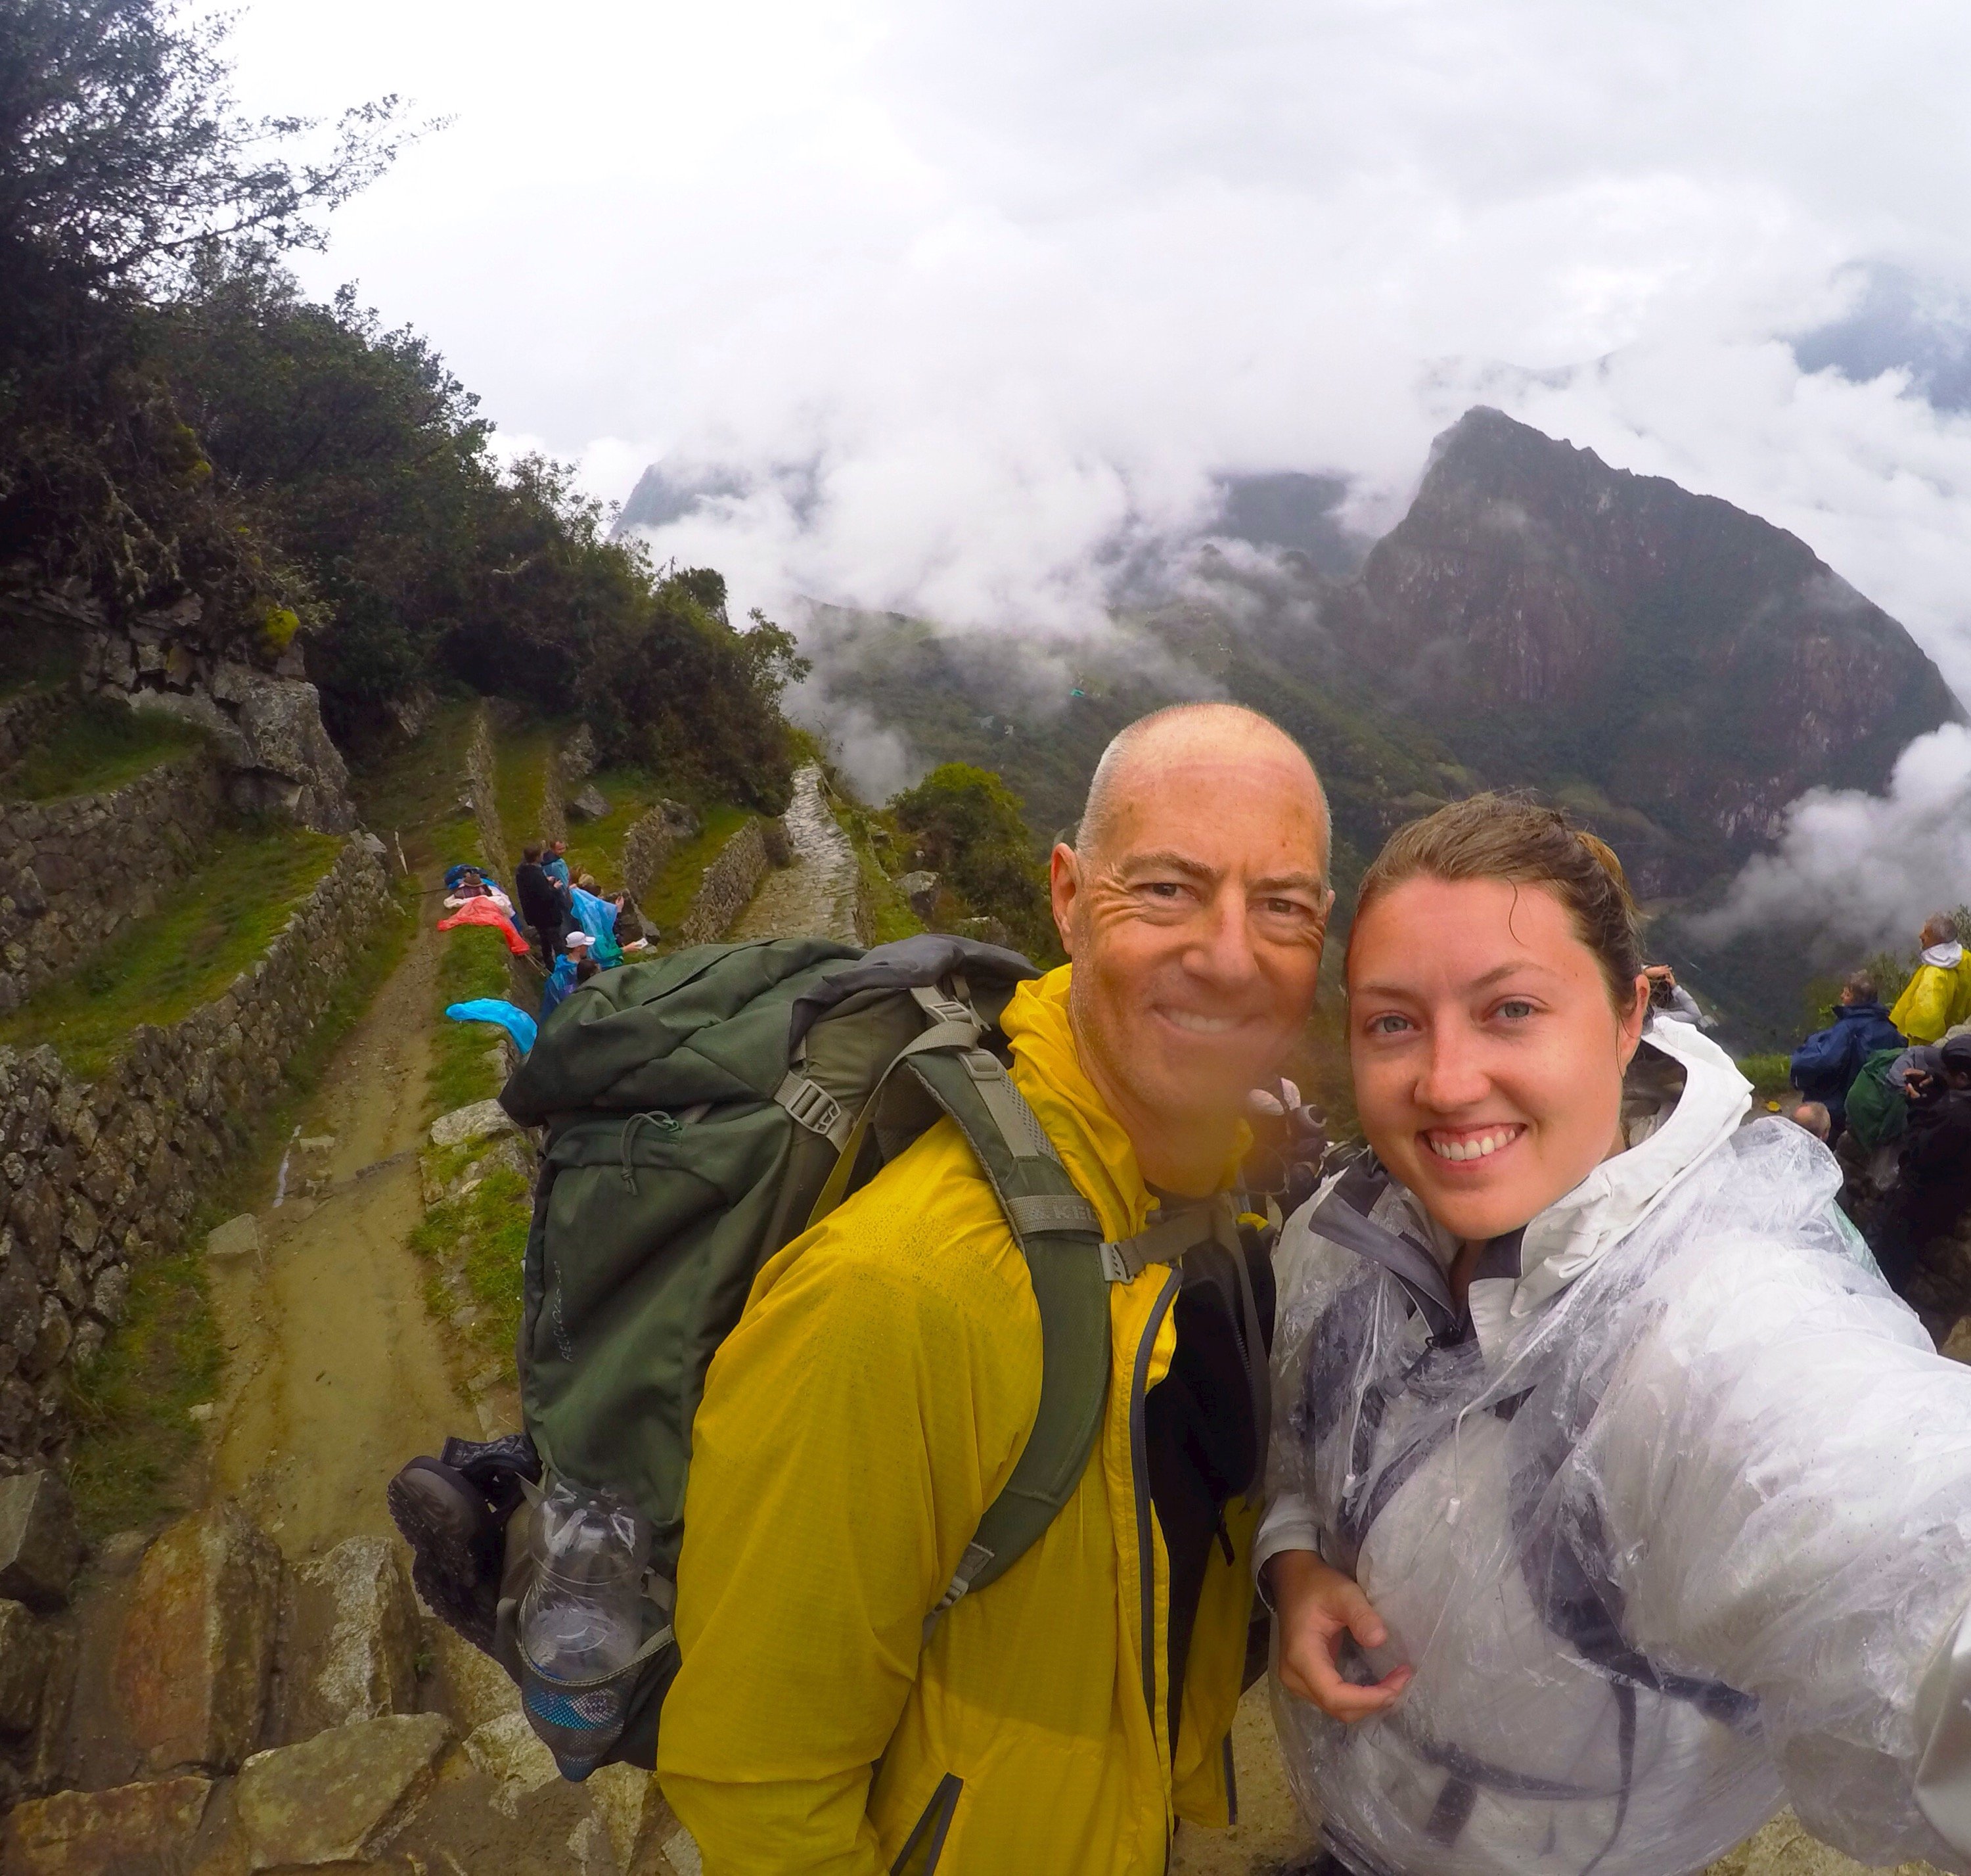
The last day of hiking to Machu Picchu started pretty miserably, unfortunately. We were woken up at 3:30 am in the early morning by the porters in the pitch black to a torrential downpour.
I’m not kidding, the rain drops were the size of snowballs and there were literal rivers forming around the campsite. Because it was raining so hard we had to move even quicker to pack up and get out of our tents so the porters could clean up and take them down.
This wasn’t the easiest thing to do at 3:30am while everything was wet.
3:30am is the standard wake-up call for the final day of the trek. Some treks even woke up earlier!
Even though it was raining, everyone still had a positive attitude and was ready to kickstart the final day to one of the most famous archeological sites in the world!
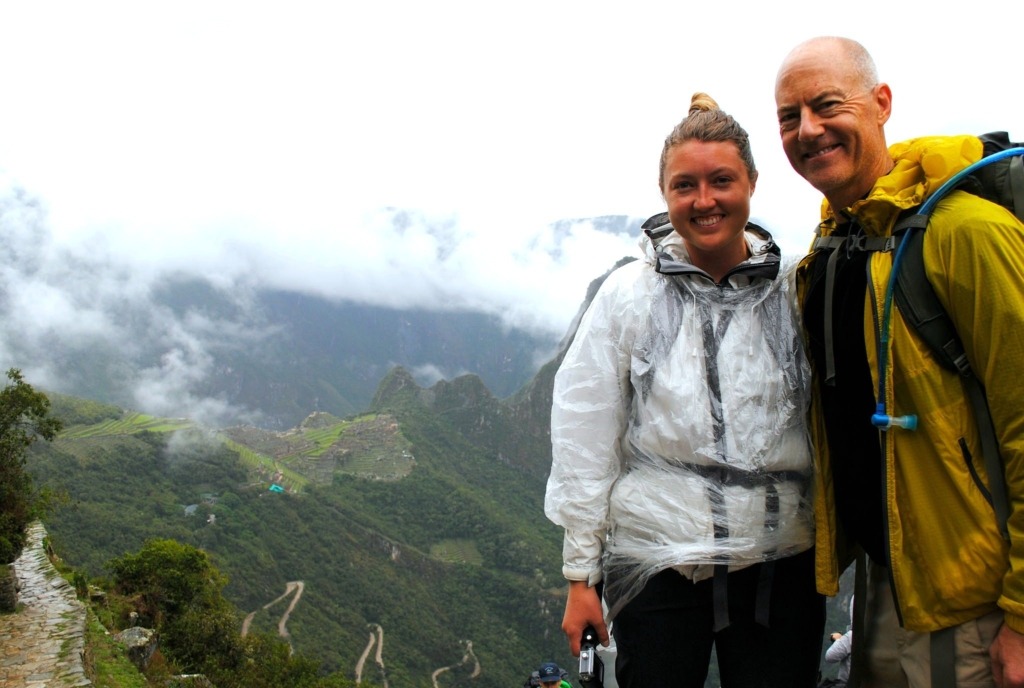
After breakfast, we started hiking and I was so grateful I bought a poncho! If you hike the Inca Trail please buy one and bring a rain jacket! Even my pants and hiking boots soaked through and it felt like I was walking in puddles.
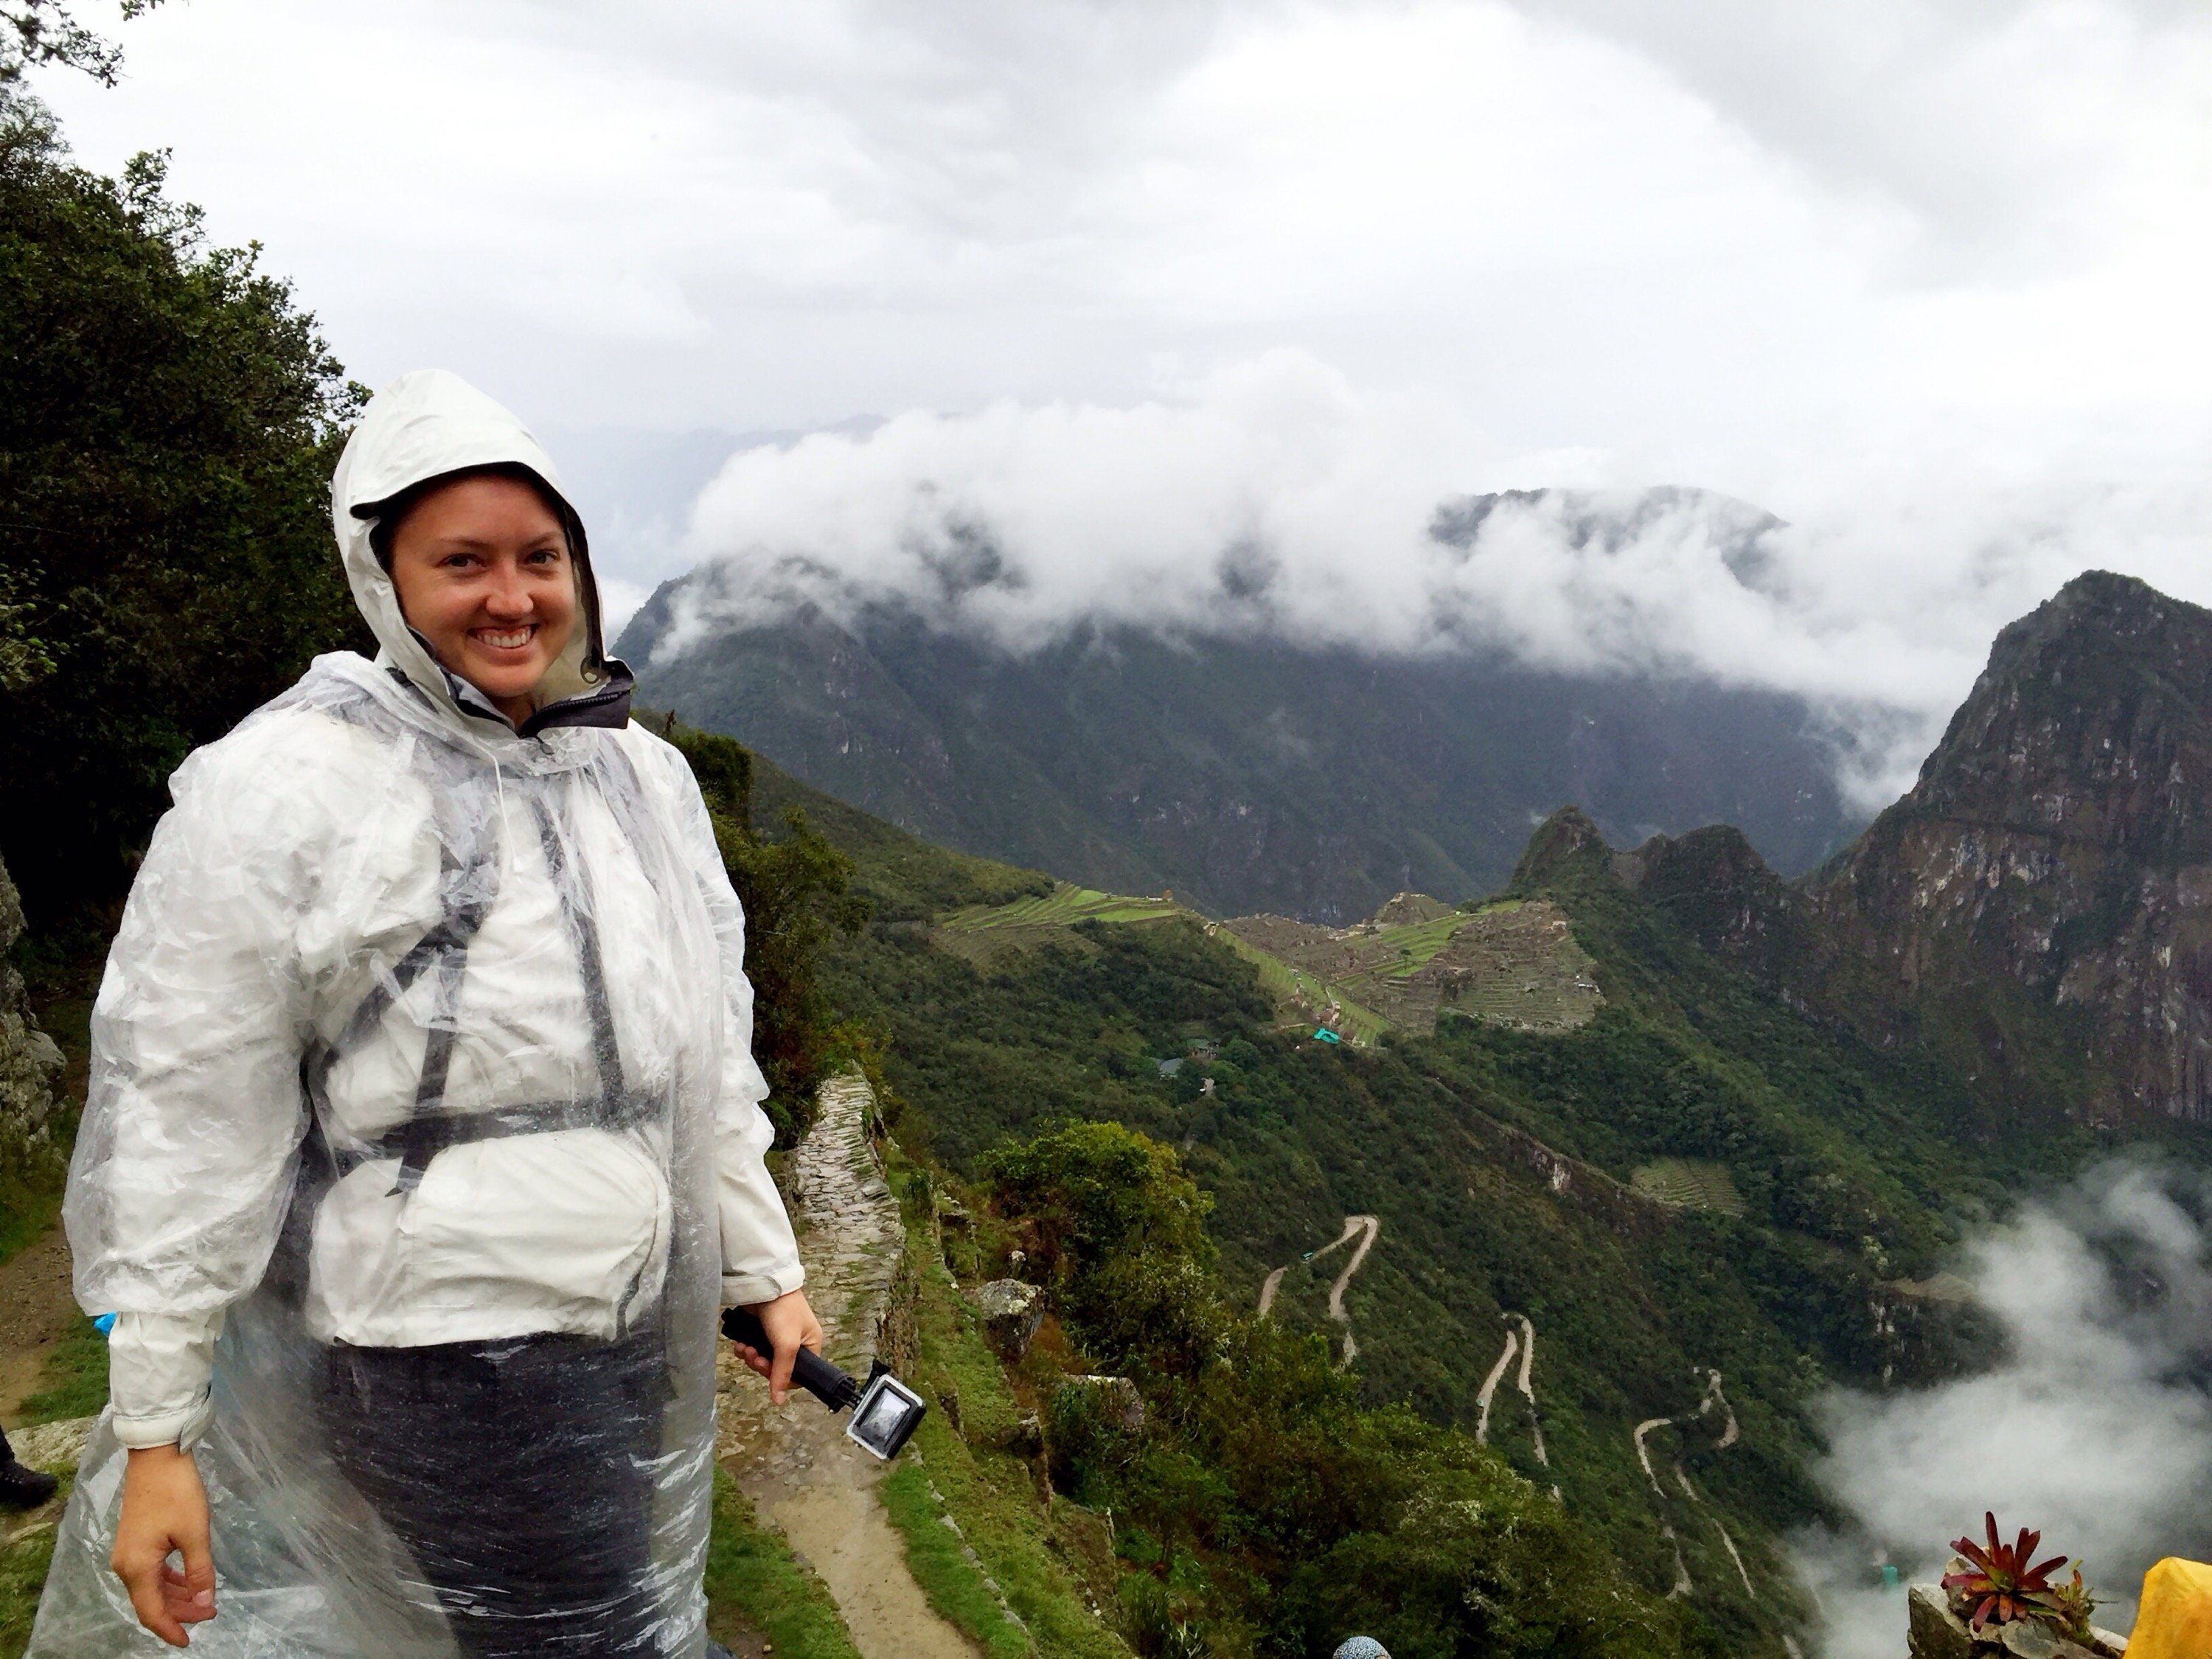
(Here I am looking like a BLIMP at the Sungate – not the cute photo of me I had imagined before going to Machu Picchu haha)
Waiting at the control point
We walked a few minutes down the Inca Trail checkpoint and waited under the roof of the checkpoint until they opened it at 5:30am.
We had to wait for someone to check the trail and make sure it would be safe to go up in the rain and then we could all go up in order of who arrived to the checkpoint first.
The path was somewhat thin on the way up so we had to go single file most of the way. We hiked straight uphill for an hour and a half in the rain. Needless to say, I was so ready to get to the sun gate!
Monkey Steps and the Sun Gate
Finally, we arrived to the Monkey Steps which were straight up (almost like a wall) and we had to climb up with our hands. I was so ready to get over those that I practically climb/ran up them!
We arrived at the SunGate aka inti punku and couldn’t see Machu Picchu at first because it was rainy and cloudy. Luckily the clouds parted for a second and we got to see Machu Picchu in the background. It was amazing to see from that high up and to know we had finally made it!
Hike to Machu Picchu
To get to Machu Picchu we still had to hike about 45 minutes downhill through the cloud forest. It drizzled most of the way down, but stopped raining right before we arrived and the clouds parted! It was PERFECT timing and I was so happy!


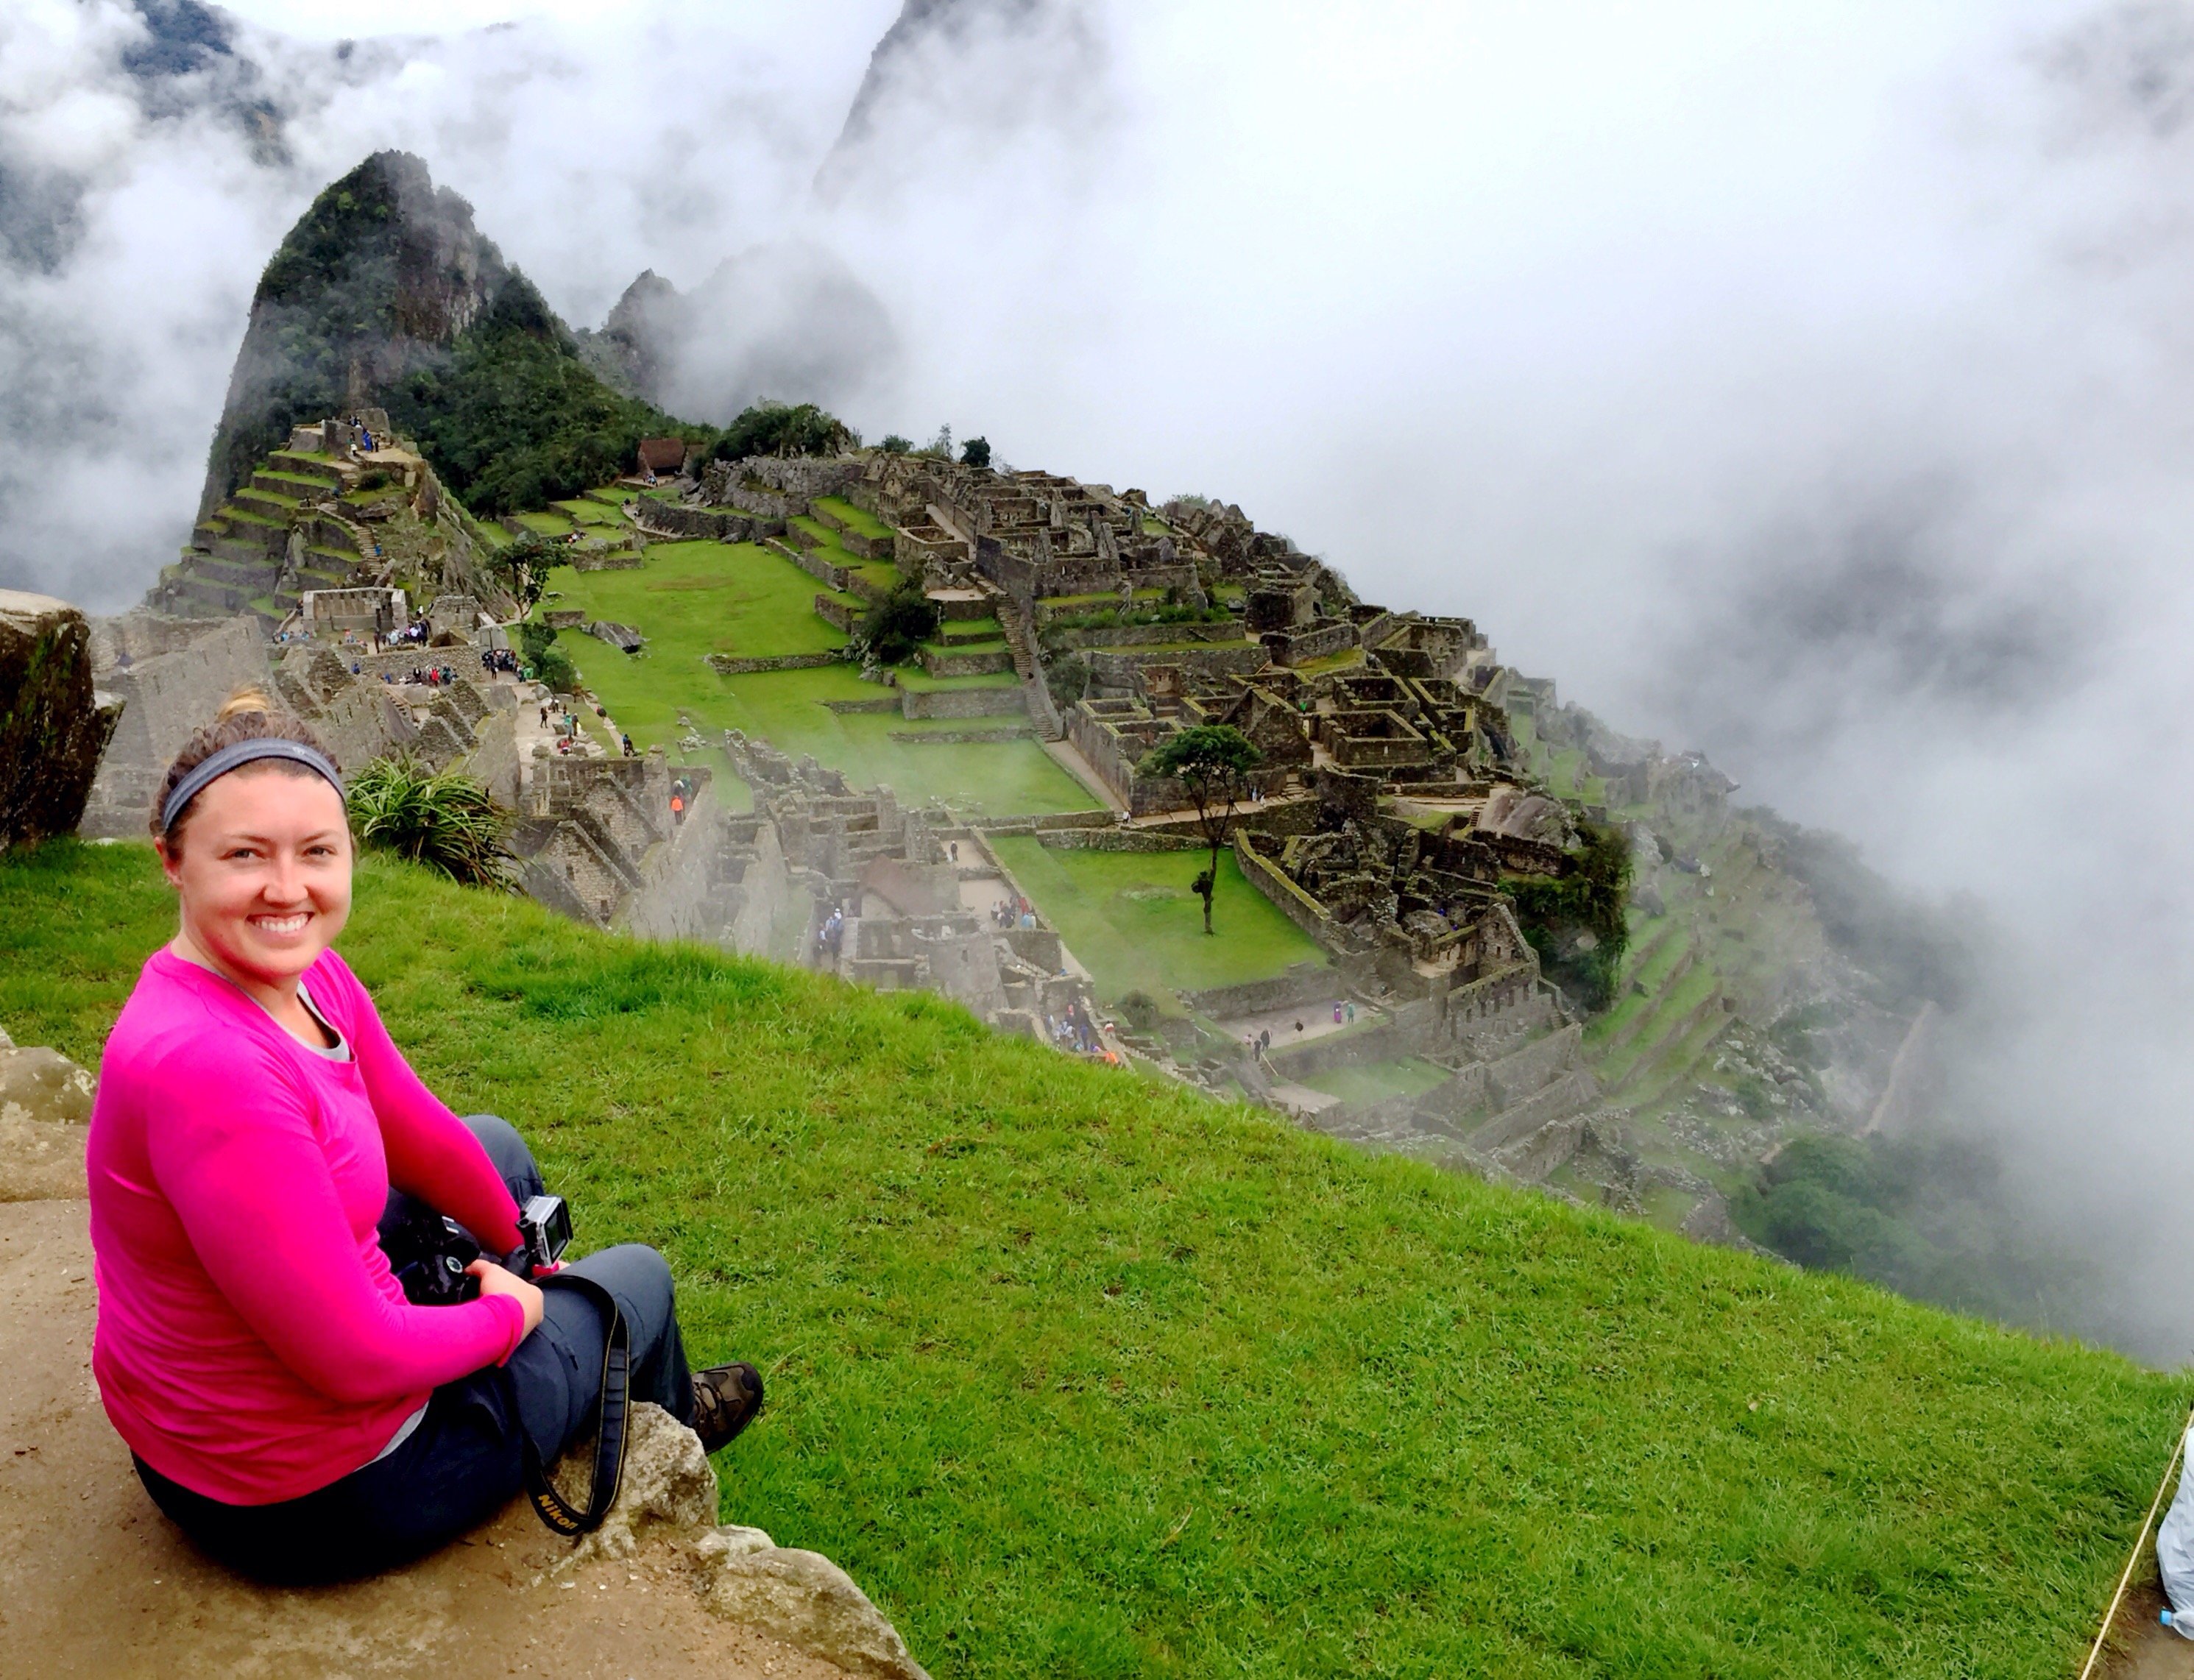
Arrival at Machu Picchu
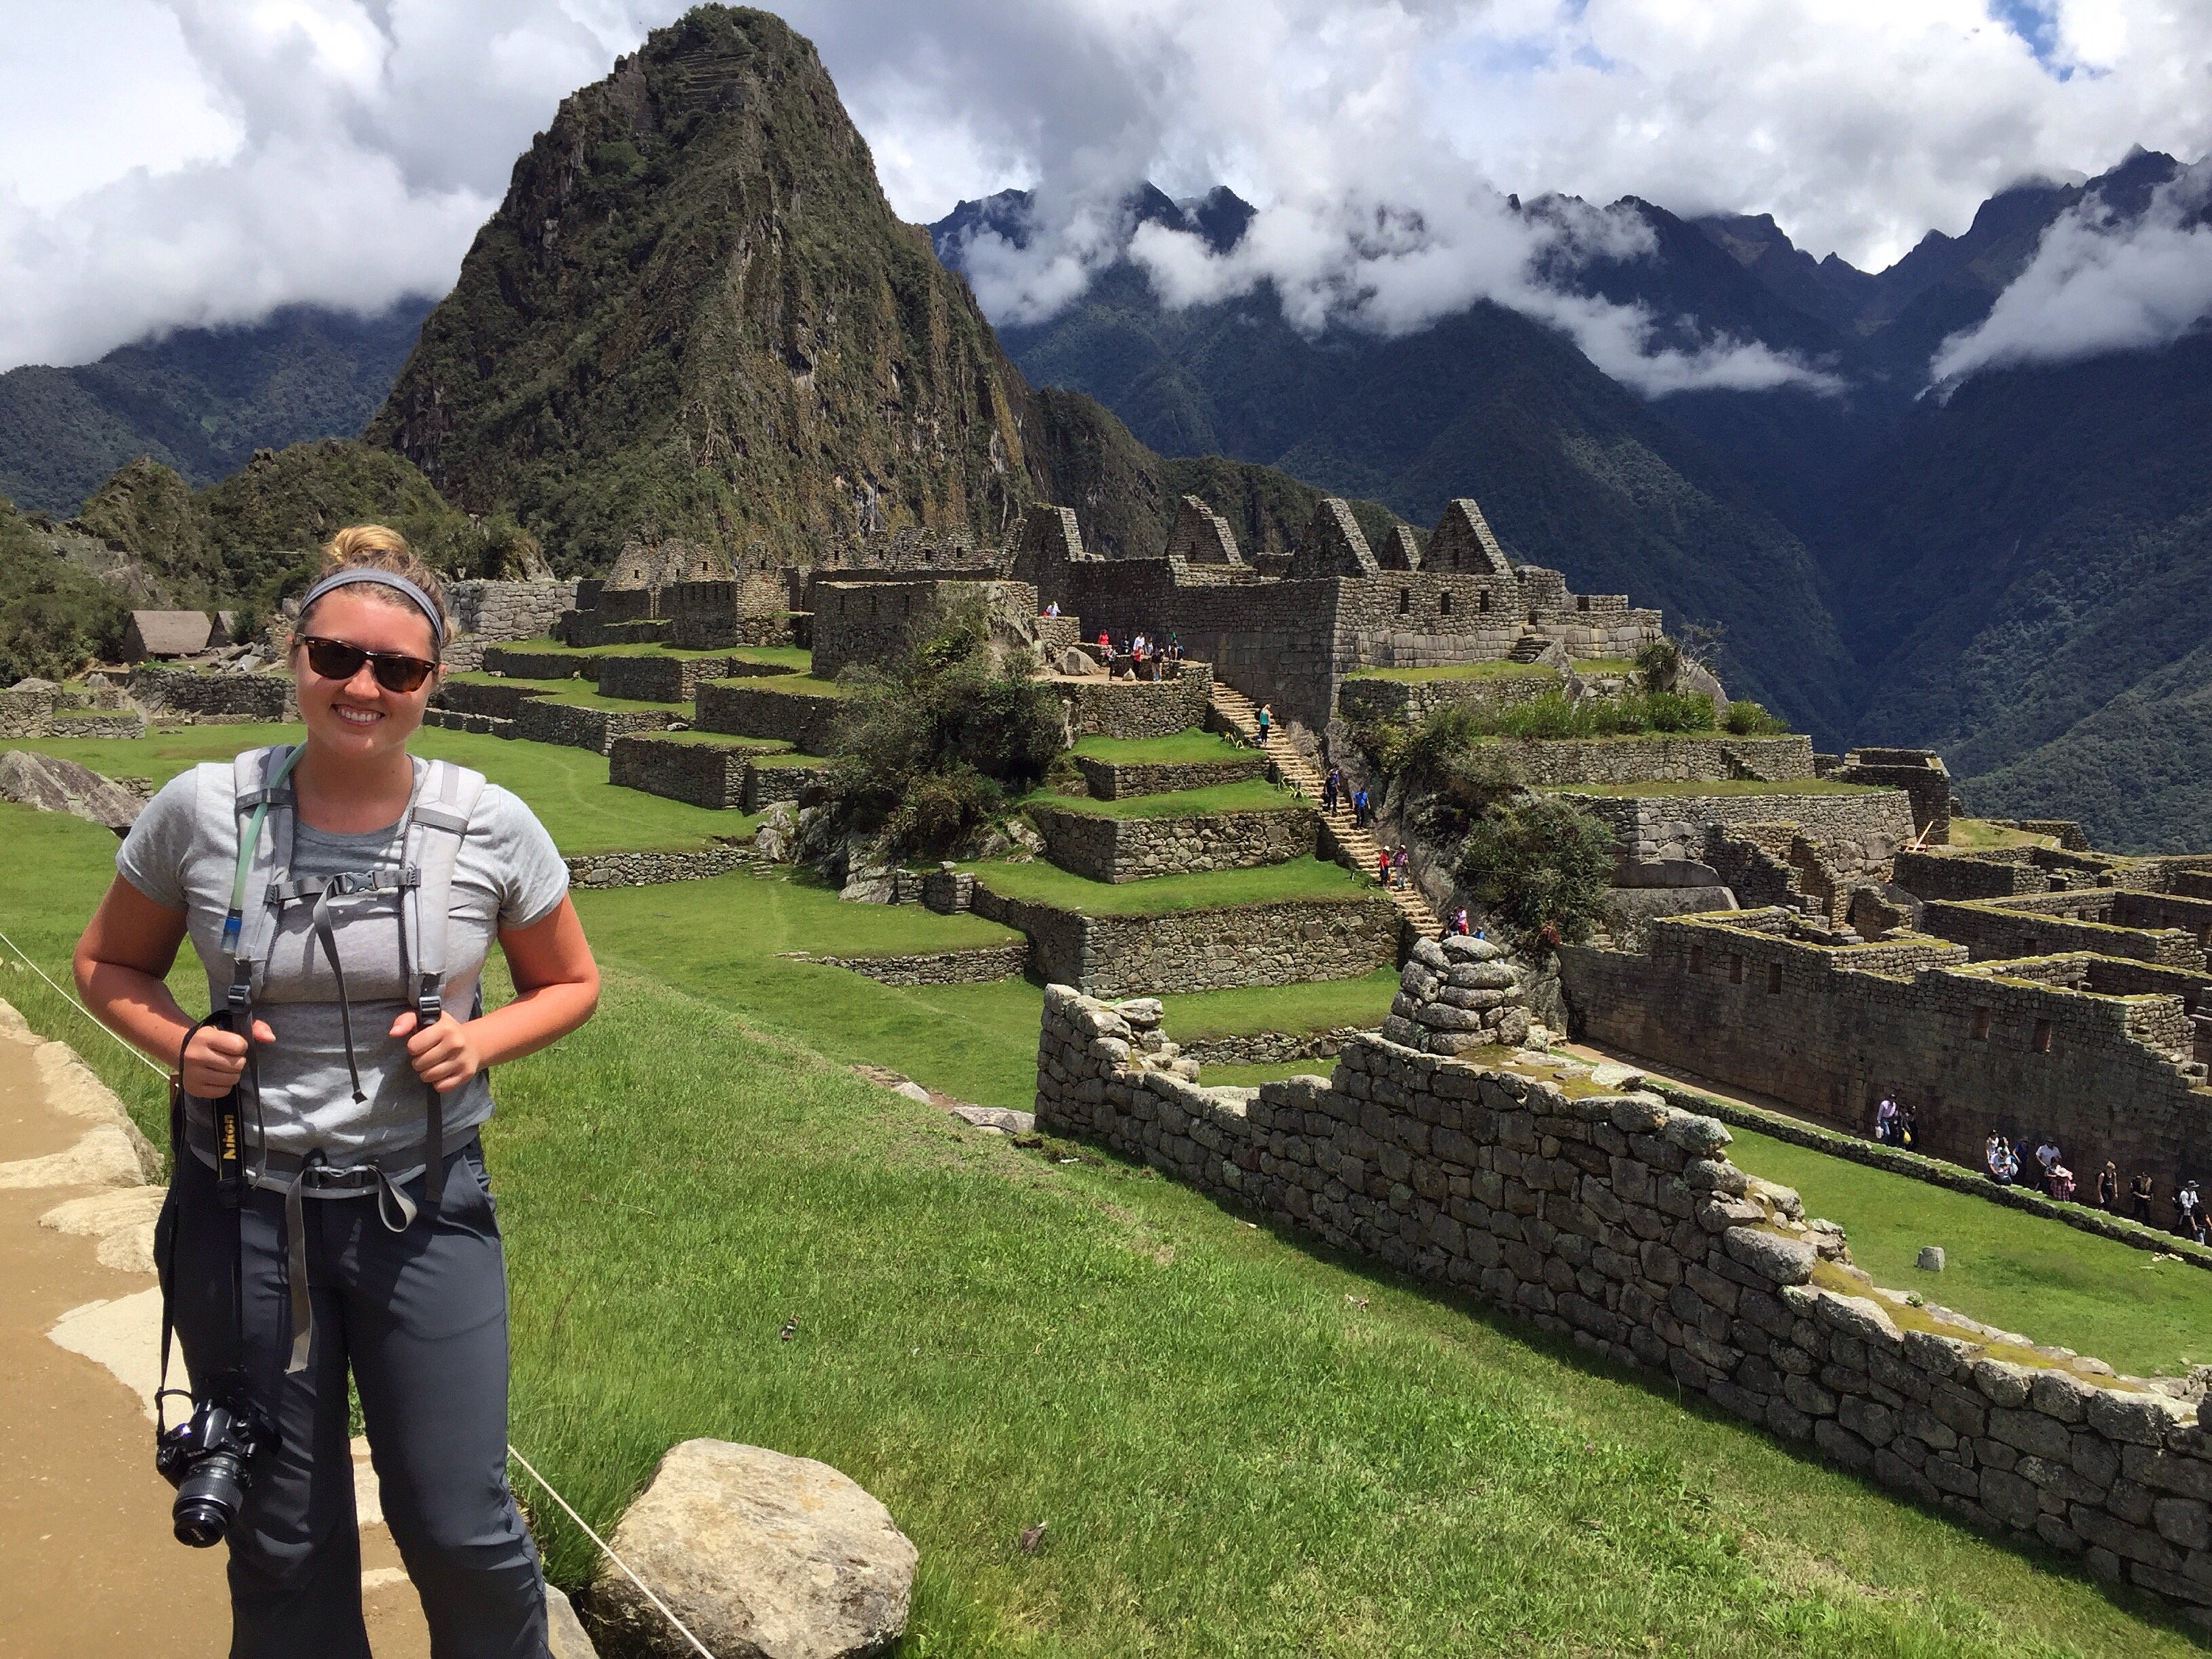
Right when we arrived to Machu Picchu we all got a little overwhelmed. This was mainly because there were already TONS of tourists there in their makeup and clean clothing taking pictures all over the place. Okay…maybe I was a little jealous they all were looking good in the photos 🙂
Machu Picchu was still amazing though! It was a major change from hiking peacefully in the mountains and cloud forests, but it was magnificent!. We went to get our passports stamped and checked in and then got a 2-hour tour from Ernesto. All of us were zombies at that point and hiking up the steps of the ruins was really difficult for everyone. I think we were just ready to be done at that point.
After the tour, we took some photos and hung out for 30 mins. The different temples of Machu Picchu really were amazing and I now know why people travel miles and miles to come see it!
I still think the trek was better than the final destination, but Machu Picchu is still as stunning as ever!
Once you’re at Machu Picchu, you also have the option to hike to the Huayna Picchu mountain which is the large mountain at Machu Picchu. It was a hell no for me because I was so tired, but I know that a lot of people who don’t do the Inca Trail Hike and just take the train up, choose to do this! You can also take a day tour of Machu Picchu if you’d like—or explore on your own!


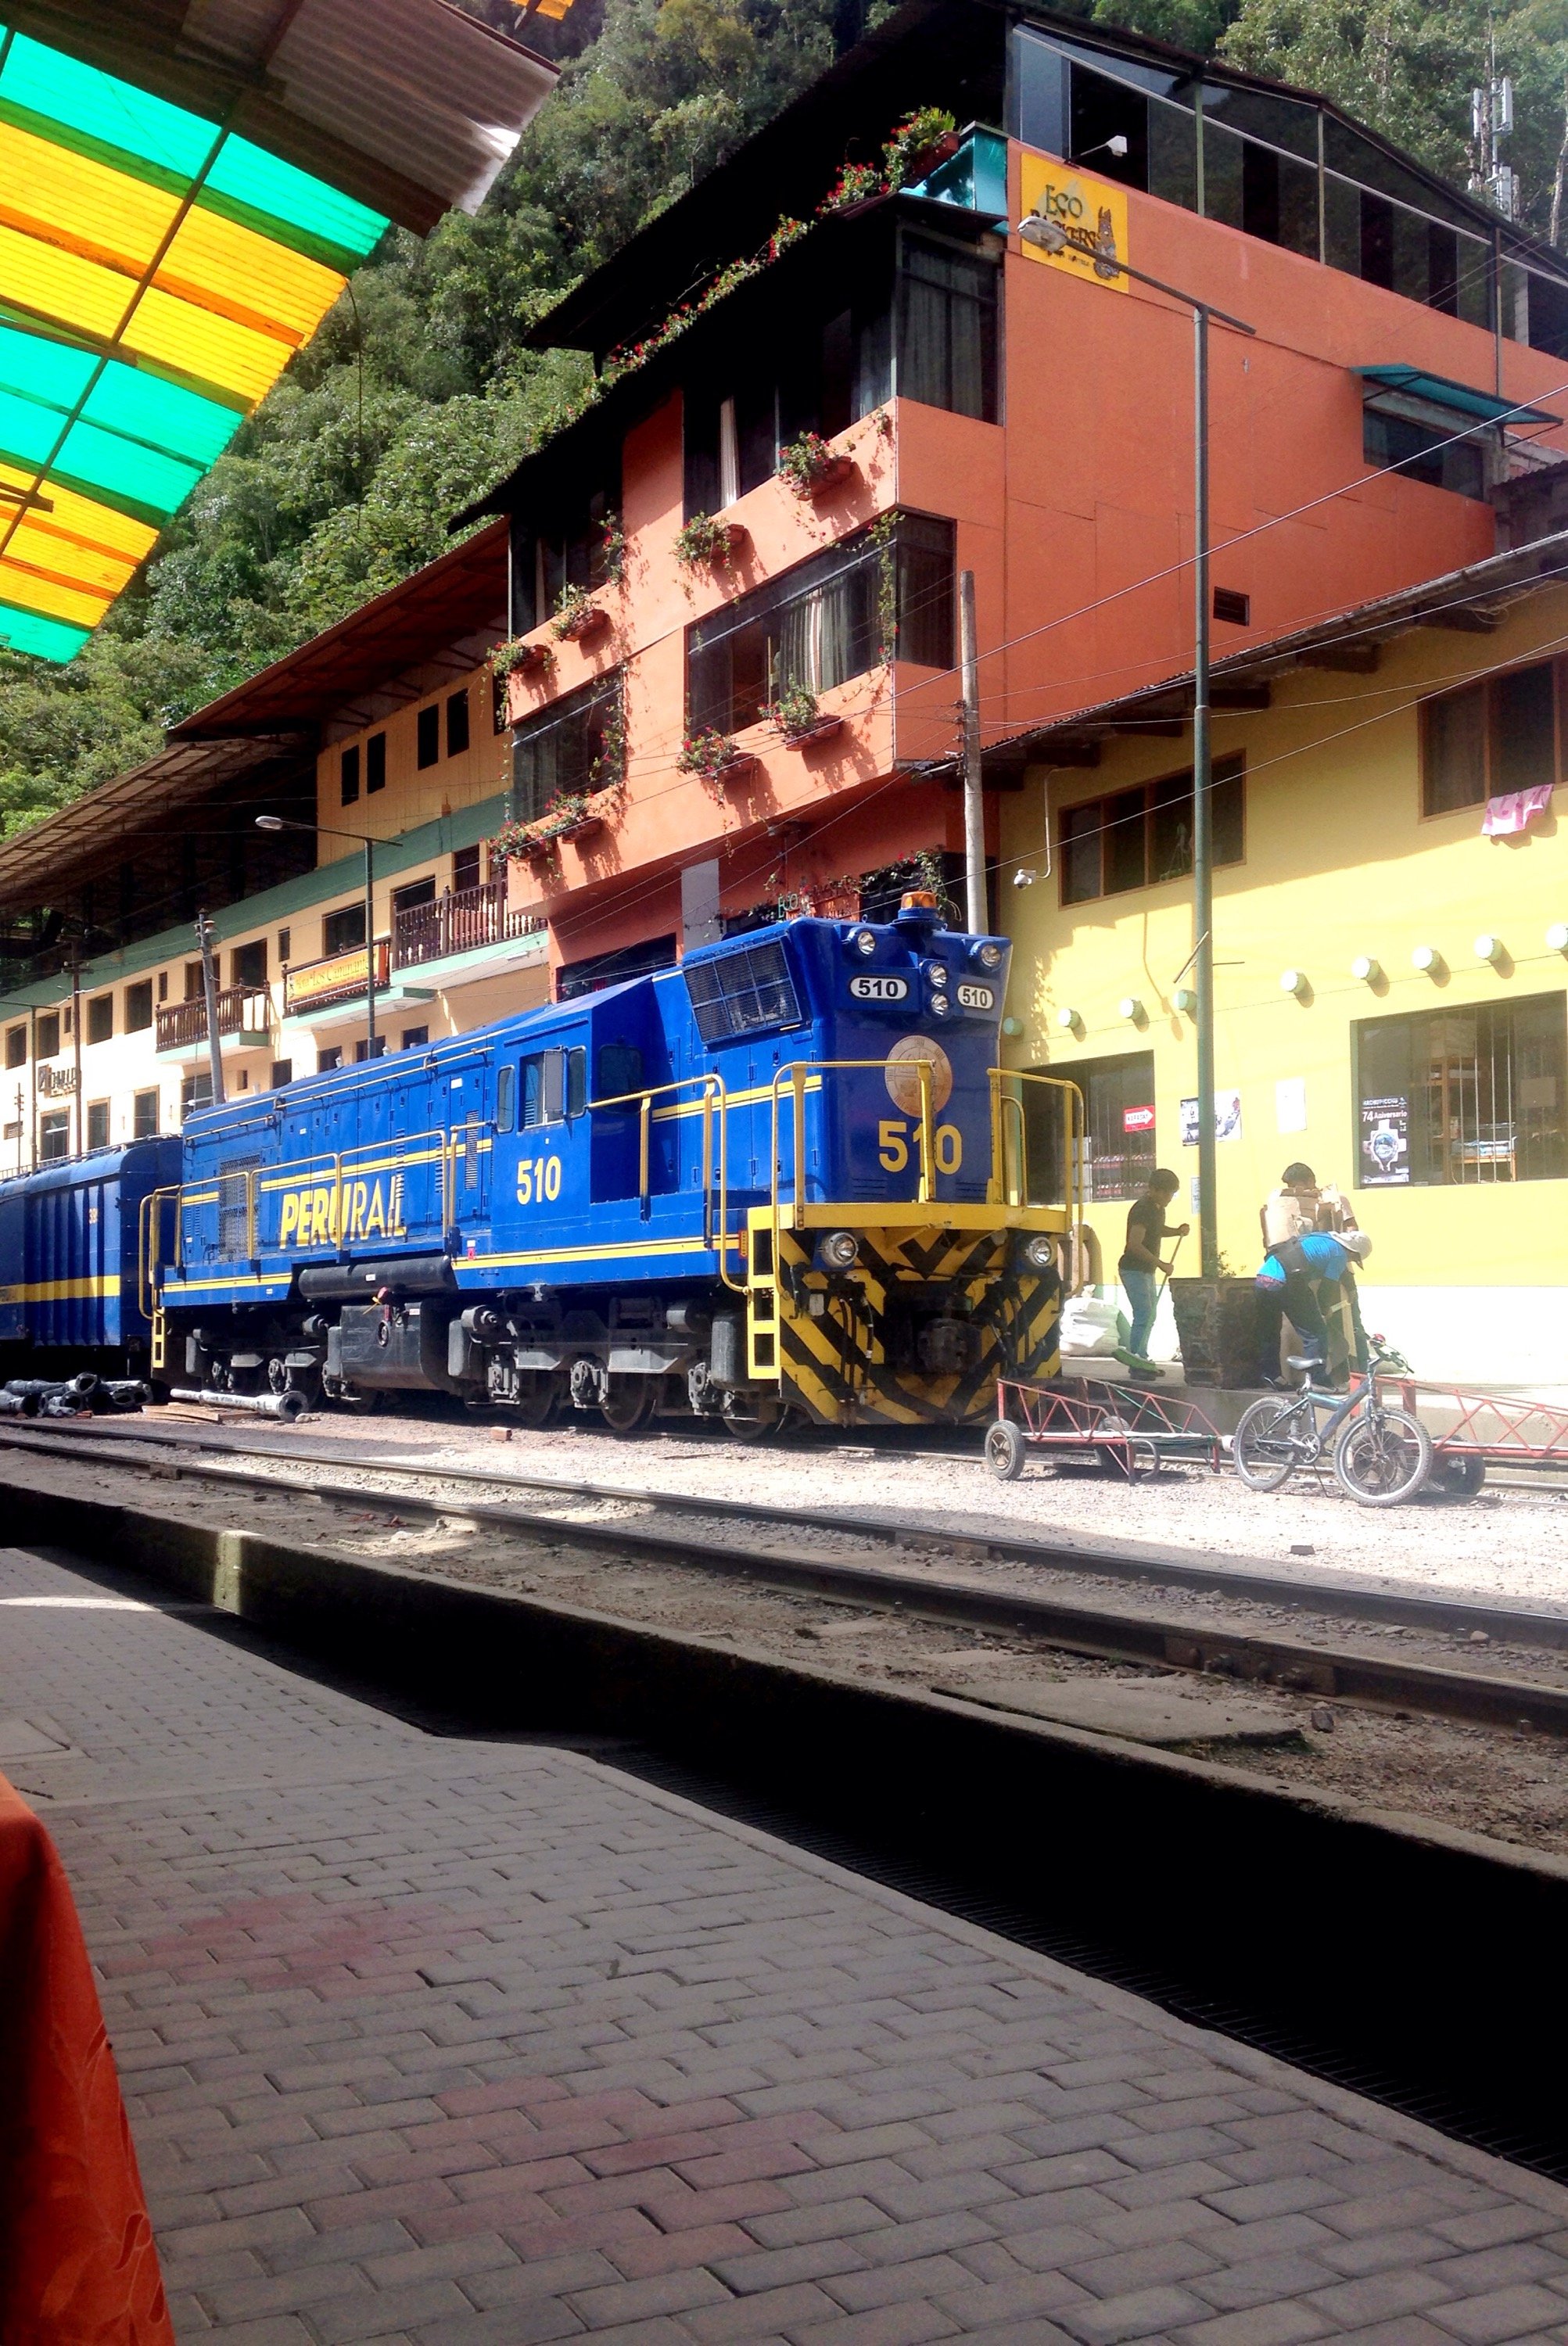
The town of Aguas Calientes
After we were done looking around we took the bus down to Aguas Calientes on the Urubamba River to get lunch and massages before we went to the train station to head back to Cusco! Many people go to the hot springs here to soak after a long 4-day trek!
Packing Tips
To see my full guide and packing list with everything you should bring with you while hiking the Inca Trail to Machu Picchu click here! In the meantime, I’ll share a few of the essentials.
Hire a half-porter
I highly recommend hiring a porter unless you hike quite a bit and enjoy walking up a steep incline for hours with heavy stuff on your back. My dad and brother and another dad and son on our trek all came with the notion of carrying their large backpacking backpacks and had to get a porter halfway through. Luckily, you can do that! But I recommend getting a half-porter before you even start the trek!
Usually, if you get a porter, you’ll get to put 5.5kg inside their duffle bags. My sleeping mat and sleeping bag (that I rented) were 3kg, which left me 2.5kg (5.5 lbs) to pack in the duffle bag they provided. This ended up being fine for me! In the duffle bag, I gave them, I put my sandals, a large fleece, all of my toiletries, and the rest of my clothes. The rest of it I packed in my day pack. My main advice is to make sure you don’t pack too much.
Rent a sleeping bag, mat, and hiking poles
We rented all of these items through our tour company, Peru Treks. Some people didn’t have poles, and I gave one of mine to a girl who didn’t have any, and it probably saved her life going downhill. It’s steep! You can bring your own sleeping bag, but it was easier for me not to haul one around the rest of Peru.
Bring enough cash and your passport
You’ll need money to tip the porters at the end of your trek. Usually, your trekking company will tell you the correct amount to tip the guide and porters. Make sure you bring this with you and try and get smaller bills if possible. You’ll also have a chance to buy water from local ladies, so have money for water and snacks at least for the first 2 days.
Be prepared for the toilets
I’m not going to lie; the toilets on the Inca Trail are nasty, but they aren’t AS gross as the horror stories I had heard. Pull your pant legs up high, bring your toilet paper and headlamp, and don’t look around. Most are squatting toilets with a hole in the ground and porcelain around the hole. They usually spray them down with water every few hours but still be prepared for the worst, and you won’t be as grossed out. Bring wipes and toilet paper with you.
Weather can be unpredictable
The weather can be unpredictable, with fog rolling in after a scorching hot stint, followed by rain, so be prepared and pack layers.
This is the water situation
I thought I’d be drinking water from a stream I’d have to get myself, but that wasn’t the case. Never once did I use the iodine drops that I bought. For the first 2 days, you’ll drink water from water bottles you’ll buy from local ladies. I just filled up my Camelback pouch with those. The next two days, the porters will boil water for you. I wouldn’t even bring a water filter or iodine drops if I were you.
Don’t forget these things
- Headlamp
- Packing cubes – these are awesome and will help keep your stuff organized in the porter bag. You can also use one as a pillow if you stuff your coat inside.
- Fold-up water bottle
- Camelback hydration pack
- Daypack
- Battery pack extra chargers
- Sleeping Bag (provided)
- Sleeping Mat (provided)
- Hiking Poles
- Personal Belongings: camera, cell phone, your original passport you used to buy your ticket (you need this to enter Machu Picchu)
- Insect Repellant
- Sunscreen
- Travel Insurance
- Toilet Paper – Bring an entire role because there isn’t any provided.
- Baby wipes – These were a lifesaver! They worked to clean off after a long day of hiking.
- Face wipes – I didn’t bring makeup on the trek, but my face would be caked with dust each night, so these were nice!
- Neosporin and band-aids
- Hand sanitizer
See everything else you should pack here!
Other ways of getting to Machu Picchu
Not into hiking the full 4-day Inca Trail to Machu Picchu trek? I’ve heard of a lot of people who have done the Salkantay Trek as well and said it was also awesome, so that’s another option. You can also take the train to Machu Picchu and do a day hike up to Huayna Picchu.
Related Post: 10 Amazing Sites You’ll See Only If You Hike the Inca Trail
Wrapping Up
I seriously cannot believe I actually did one of the most famous treks in the world. Honesty, I probably blacked out half of it because it feels like it went by so fast, but I do remember that it was an incredible and unforgettable experience! Now I feel stronger both mentally and physically and am so happy I got this have this experience. I highly recommend it! 🙂
Read Next:
PIN IT:


Leave A Comment